Air Fryer Frozen French Fries: Crispy and Easy

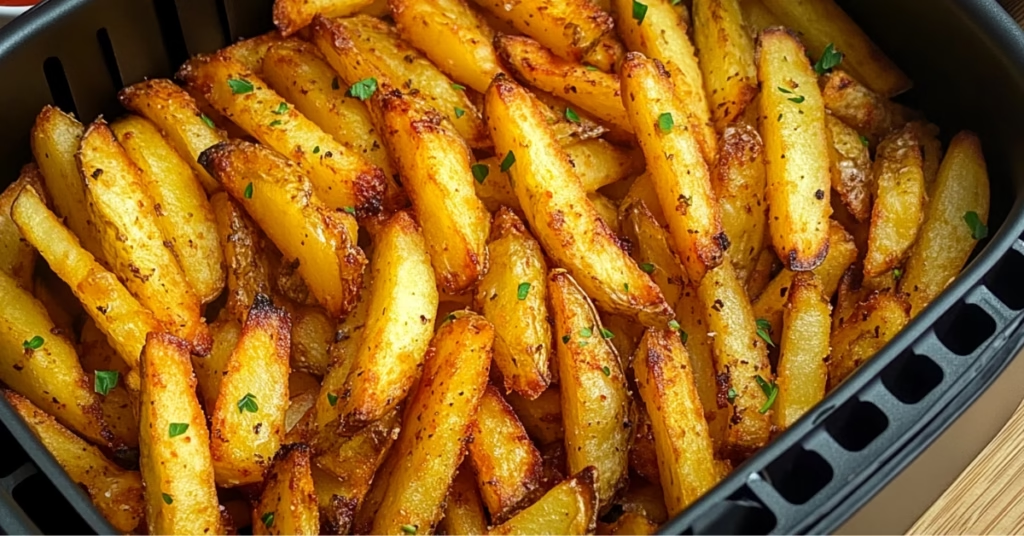
Golden crispy air fryer frozen French fries served in a basket with a side of ketchup and aioli, garnished with parsley.

Frozen French fries are a timeless comfort food loved for their crispy texture and delicious flavor. Using an air fryer takes this classic treat to the next level, offering a healthier, quicker, and easier way to prepare them. This guide will provide everything you need to know about making Air Fryer Frozen French Fries, including detailed steps, flavoring ideas, and troubleshooting tips.

Why Use an Air Fryer Frozen French Fries?

Air fryers have revolutionized cooking, providing an efficient way to make crispy, delicious snacks with minimal effort. Here’s why they’re perfect for frozen French fries:

  • Health Benefits: Air fryers use hot air instead of oil, reducing calorie intake without compromising flavor or texture.
  • Quick Cooking: They preheat and cook faster than ovens, making them perfect for busy days.
  • Even Crispiness: Circulating hot air ensures every fry is perfectly golden and crispy.

Learn more about the magic of air fryers in How to Make Air Fryer Beef Jerky, another fantastic air fryer recipe.

ingredients:

Air Fryer Frozen French Fries

Recipe by Air Fryer RepastsCourse: Appetizer, SideCuisine: AmericanDifficulty: Easy
Servings

4

servings
Prep time

5

minutes
Cooking time

15

minutes
Calories

200

kcal

Ingredients

  • 1 bag frozen french fries

  • 1 tablespoon olive oil

Directions

  • Preheat your air fryer to 400 degrees Fahrenheit, ensuring it reaches the proper temperature before adding the fries.
  • Place frozen french fries in a large mixing bowl and drizzle with olive oil, stirring them to ensure even coating.
  • Arrange the coated french fries in the air fryer basket in a single layer to help them cook evenly and crisp up.
  • Cook the fries in the air fryer for 15 minutes, shaking the basket halfway through to promote even cooking.
  • Check for desired crispiness and cook for an additional 2-3 minutes if necessary. Serve immediately with your favorite dips.

Notes

  • Great Recipe And Fastest One

Selecting the Best air fryer Frozen French Fries

Not all frozen fries are created equal, and choosing the right kind can make a big difference:

Types of Frozen Fries

  • Shoestring: Thin and crispy, these fries cook quickly in an air fryer.
  • Crinkle-Cut: The ridges create a fun texture and hold sauces well.
  • Steak Fries: Thick and hearty, they require longer cooking times.
  • Sweet Potato Fries: A healthier alternative with a natural sweetness.

Factors to Consider

  1. Pre-Seasoned or Plain: If you enjoy customizing your seasoning, go for plain fries.
  2. Brand Quality: Premium brands often deliver better texture and flavor.
  3. Coated Fries: Some fries come with a crispy coating designed for air fryers.

Looking for more air fryer tips? Check out Perfect Air Fryer Chicken Tenderloins.

How to Cook Air Fryer Frozen French Fries Recipe

Cooking frozen fries in an air fryer is a breeze with these steps:

Step 1: Preheat the Air Fryer

Set your air fryer to 375°F–400°F (190°C–200°C). Preheating ensures even cooking.

Step 2: Arrange the Fries

Place fries in a single layer in the air fryer basket. Avoid overcrowding, as this can lead to uneven cooking.

Step 3: Cook

  • Cooking Time: Most fries take 12–15 minutes, but check packaging for specific recommendations.
  • Shake the Basket: Toss the fries halfway through to promote even browning.

Step 4: Optional Oil Spray

Lightly mist fries with oil for extra crispiness, especially if they’re plain.

Step 5: Season and Serve

Season immediately after cooking while the fries are still hot, as this helps the seasoning stick.

Pro Tips for Perfectly Crispy Fries

Achieving crispy fries every time is easy if you follow these tips:

  1. Cook in Batches: Overcrowding the basket prevents air from circulating, leading to soggy fries.
  2. Use the Right Temperature: A high temperature (375°F–400°F) ensures crispiness.
  3. Shake Regularly: Tossing the fries midway ensures even cooking.
  4. Use a Light Oil Spray: A small amount of oil enhances the texture without making the fries greasy.
  5. Add Seasoning After Cooking: Adding seasoning before cooking can lead to uneven flavor distribution.

Seasoning Ideas for Air-Fried Fries

Transform basic fries into a gourmet experience with these seasoning combinations:

Classic Options

  • Salt and pepper.
  • Garlic powder with a touch of parsley.

Gourmet Flavors

  • Truffle Oil and Parmesan: Sprinkle grated parmesan and drizzle truffle oil for a luxurious twist.
  • Garlic Parmesan: Combine garlic powder and grated cheese.

Spicy Mixes

  • Cajun Fries: Add Cajun spice for a bold, smoky flavor.
  • Paprika and Chili Powder: For a kick of heat.

Sweet Options

  • Cinnamon Sugar: Perfect for sweet potato fries.
  • Honey Drizzle: A touch of honey enhances the natural sweetness of sweet potatoes.

Dipping Sauces to Pair with Fries

The right dip can take your fries to the next level. Here are some ideas:

  • Classic Dips: Ketchup, mayonnaise, or ranch.
  • Homemade Favorites: Aioli, chipotle mayo, or cheese sauce.
  • Healthy Alternatives: Greek yogurt dip or guacamole.

Looking for more creative air fryer recipes? Check out Air Fryer Grilled Cheese.

Troubleshooting Common Issues

Even with an air fryer, things don’t always go as planned. Here’s how to address common problems:

Problem: Soggy Fries

  • Cause: Overcrowding or low temperature.
  • Solution: Cook fries in smaller batches and increase the temperature.

Problem: Burnt Fries

  • Cause: Cooking too long or at too high a temperature.
  • Solution: Reduce the cook time and monitor closely.

Problem: Uneven Cooking

  • Cause: Failing to shake the basket.
  • Solution: Toss fries halfway through cooking for even results.

Advanced Tips for Air Fryer Enthusiasts

Ready to take your air fryer skills to the next level? Try these advanced techniques:

  • Double Cooking: Cook fries at a lower temperature for the first half and then increase it to crisp them up.
  • Experiment with Accessories: Use air fryer liners or silicone mats to make cleanup easier and prevent sticking.
  • Preheat Longer: For extra crispiness, let the air fryer preheat for an additional 2–3 minutes.

Benefits of Cooking Air Fryer Frozen French Fries On An Air Fryer

Cooking frozen French fries in an air fryer offers numerous benefits:

  • Healthier: You can enjoy fries without the guilt of deep frying.
  • Convenient: Faster and easier than traditional methods.
  • Versatile: Experiment with different fry types, seasonings, and dips.

Conclusion

Cooking Air Fryer Frozen French Fries Recipe is not only quick and easy but also delivers a healthier and more satisfying snack. Whether you’re a fan of classic fries or enjoy experimenting with unique flavors, an air fryer opens up endless possibilities. With proper techniques, creative seasonings, and the right dips, you can elevate this simple snack into a gourmet delight.

Looking for more ways to use your air fryer? Dive into Air Fryer Potato Wedges for another delicious recipe!

Got a Minute? Leave Us a Review!

0.0
0.0 out of 5 stars (based on 0 reviews)
Excellent0%
Very good0%
Average0%
Poor0%
Terrible0%

Others Reviews

There are no reviews yet. Be the first one to write one.


Did You Like Our Recipe ? Share it With Your Friends And Enjoy With them

Air Fryer Taquitos: How to Make Easy Crispy Taquitos in 10 Minutes

Air Fryer Taquitos

Air fryer taquitos are the perfect combination of crispy texture, savory fillings, and healthy cooking. Whether you’re whipping up a quick snack, an appetizer for a party, or a simple dinner, these rolled tortillas filled with meat, cheese, or veggies deliver big flavor without the mess and calories of deep frying.

In this comprehensive guide, we’ll cover everything you need to know about making the best air fryer taquitos, including detailed recipes, variations, serving suggestions, expert tips, and more. We’ll also provide internal links to related recipes that will take your air frying game to the next level.

Why Air Fryer Taquitos Are the Best

Air frying has revolutionized the way we prepare classic comfort foods. Here’s why air fryer taquitos are an unbeatable choice:

  • Healthier Option:
    Traditional taquitos are deep-fried, soaking up excess oil. Air frying reduces oil usage by up to 80%, making your taquitos lower in fat and calories.
  • Quick and Easy:
    With an air fryer, you can cook taquitos in just 8-10 minutes, making them perfect for busy weeknights or last-minute gatherings.
  • Consistent Crispiness:
    The air fryer ensures that your taquitos come out golden brown and crispy every time.
  • Less Mess:
    No need to deal with hot oil splatters or messy cleanup.

If you’re new to air frying, try this simple Air Fryer Asparagus Recipe to get comfortable with your appliance.

Ingredients for Perfect Taquitos

Air Fryer Taquitos

Recipe by Air Fryer repastsCourse: Lunch, DinnerCuisine: MexicanDifficulty: Easy
Servings

4

servings
Prep time

30

minutes
Cooking time

40

minutes
Calories

300

kcal
Total time

1

hour 

10

minutes

Ingredients

  • 1 lb ground beef

  • 1 tbsp taco seasoning

  • 0.5 cup salsa

  • 8 pieces corn tortillas

  • 1 cup shredded cheese

  • 1 tbsp vegetable oil

Directions

  • Preheat your air fryer to 400 degrees F for about 5 minutes to ensure it is hot enough for cooking the taquitos.
  • In a skillet, cook the ground beef over medium heat until fully browned. Add the taco seasoning and salsa, mixing thoroughly.
  • Warm the corn tortillas slightly in the microwave to make them pliable and prevent tearing when filling them with the beef mixture.
  • Spoon about two tablespoons of the beef mixture onto each tortilla, top with cheese, and roll them up tightly into a taquito shape.
  • Brush each taquito lightly with vegetable oil and place them seam-side down in the air fryer basket, avoiding overcrowding the basket.
  • Cook the taquitos in the air fryer at 400 degrees F for 8 to 10 minutes until they are golden brown and crisp. Serve immediately.

To make air fryer taquitos, you need just a few key ingredients. Here’s a breakdown of the essentials:

1. Tortillas

  • Corn Tortillas: The traditional choice, providing a crispy texture when air fried.
  • Flour Tortillas: Easier to roll and offer a chewier bite.

2. Protein Fillings

  • Shredded Chicken (rotisserie or homemade)
  • Ground Beef seasoned with taco spices
  • Pork Carnitas for a rich, savory flavor
  • Black Beans or Refried Beans for a vegetarian option

For more hearty meat dishes, try this Air Fryer Meatloaf Recipe.

3. Cheese Options

  • Mexican Cheese Blend (cheddar, Monterey Jack, queso quesadilla)
  • Pepper Jack Cheese for a spicy kick
  • Cream Cheese for creaminess

4. Seasonings

5. Extras

  • Diced Green Chiles for a burst of flavor
  • Onions and Garlic for added depth
  • Avocado Oil Spray for crisping

Classic Chicken Air Fryer Taquitos Recipe

Ingredients

  • 1 cup shredded chicken
  • 1/2 cup Mexican cheese blend
  • 6 corn tortillas
  • 2 tablespoons Neufchâtel cheese
  • 2 tablespoons diced green chiles
  • 1 teaspoon vegetable oil
  • Salt and pepper to taste
  • Avocado oil spray

Instructions

  1. Prepare the Filling:
    • Heat the vegetable oil in a skillet over medium heat.
    • Sauté diced onions until soft.
    • Add minced garlic and green chiles.
    • Stir in shredded chicken, Mexican cheese blend, and Neufchâtel cheese.
    • Season with salt and pepper and cook until the cheese is melted.
  2. Warm the Tortillas:
    • Heat tortillas in a skillet or microwave until pliable. This helps prevent cracking when rolling.
  3. Assemble the Taquitos:
    • Place 2-3 tablespoons of filling in each tortilla.
    • Roll tightly and secure with a toothpick if needed.
  4. Air Fry the Taquitos:
    • Preheat the air fryer to 400°F (200°C).
    • Arrange the taquitos in a single layer.
    • Spray lightly with avocado oil.
    • Cook for 6-9 minutes, flipping halfway.
  5. Serve and Enjoy:
    • Serve with guacamole, sour cream, or salsa.

Looking for the perfect side dish? Try these Perfectly Seasoned Air Fryer Potato Wedges.

Delicious Variations to Try

1. Beef Taquitos

  • Use seasoned ground beef instead of chicken.
  • Add pepper jack cheese for extra flavor.

2. Vegetarian Taquitos

  • Fill with black beans, corn, and cheese.
  • Add sautéed bell peppers and onions for a burst of flavor.

3. Breakfast Taquitos

  • Fill with scrambled eggs, bacon, and cheddar cheese.
  • A great way to start your morning with a protein-packed meal.

4. Seafood Taquitos

  • Use shrimp or crab meat mixed with cream cheese and green onions.
  • Ideal for seafood lovers who want something unique.

For a unique snack idea, check out these Corn Ribs in the Air Fryer.

Tips and Tricks for Perfect Taquitos

  • Warm Tortillas First: This prevents them from cracking when rolled.
  • Avoid Overfilling: Too much filling makes it difficult to roll the tortillas tightly.
  • Use Avocado Oil Spray: A light spray helps achieve a golden-brown finish.
  • Don’t Overcrowd the Air Fryer: Cook in batches for even crisping.
  • Flip Halfway: Ensures both sides get crispy.

Serving Suggestions and Pairings

Pair your air fryer taquitos with these delicious sides and dips:

  • Guacamole
  • Pico de Gallo
  • Sour Cream
  • Mexican Rice
  • Refried Beans

Looking for dessert? Try these Easy 3-Ingredient Air Fryer Desserts to finish your meal on a sweet note.

Common Mistakes and How to Avoid Them

  1. Overfilling the Tortillas:
    • Keep the filling to about 2-3 tablespoons to ensure easy rolling.
  2. Skipping the Warming Step:
    • Warm tortillas to make them more pliable and prevent cracking.
  3. Not Using Oil Spray:
    • A light spray of oil helps achieve a crispy texture.
  4. Overcrowding the Basket:
    • Give your taquitos enough space to cook evenly.

FAQs About Air Fryer Taquitos

1. Can You Use Flour Tortillas?

Yes! Flour tortillas create a softer, chewier texture compared to corn tortillas.

2. How Do You Keep Taquitos Crispy?

Spray them lightly with avocado oil and cook in a single layer.

3. Can You Freeze Air Fryer Taquitos?

Absolutely! Roll the taquitos and freeze them before air frying. When ready, cook straight from frozen for 8-10 minutes.

4. What Dips Go Best with Taquitos?

  • Guacamole
  • Salsa
  • Queso Dip
  • Sour Cream

Enjoy making your own air fryer taquitos with these tips, recipes, and variations. Whether you’re craving chicken, beef, or vegetarian options, the air fryer ensures you get the perfect crunch every time. Happy air frying!

Got a Minute? Leave Us a Review!

5.0
5.0 out of 5 stars (based on 3 reviews)
Excellent100%
Very good0%
Average0%
Poor0%
Terrible0%

Others Reviews

There are no reviews yet. Be the first one to write one.


Did You Like Our Recipe ? Share it With Your Friends And Enjoy With them

Air Fryer Grilled Cheese: Crispy and Easy

Air Fryer Grilled Cheese

A grilled cheese sandwich is a classic comfort food loved by all ages. But have you ever tried making it in an air fryer? This modern kitchen gadget transforms the way you prepare grilled cheese, offering a crispy, golden-brown crust and melty cheese interior with minimal effort. An air fryer gives you quick, consistent results, and the best part is there’s no greasy mess to clean up afterward!

This guide will walk you through everything you need to know about making the perfect air fryer grilled cheese, including step-by-step instructions, creative variations, troubleshooting tips, and answers to frequently asked questions. Get ready to level up your grilled cheese game!

Craving a side dish? Pair your sandwich with these Crispy Fingerling Potatoes in the Air Fryer for a hearty meal.

Why Use an Air Fryer for Grilled Cheese?

If you’ve ever struggled with getting an evenly toasted grilled cheese on the stovetop, an air fryer can solve that problem. Here are some compelling reasons to use an air fryer for grilled cheese:

  • Even Crisping: The circulating hot air ensures the bread is toasted uniformly on both sides. No more worrying about burnt spots or uneven cooking.
  • Quick and Convenient: An air fryer typically cooks grilled cheese in 5-7 minutes, compared to the 10-15 minutes it takes on a stovetop.
  • No Mess: Forget about greasy skillets or pans to clean up. The air fryer basket makes cleanup a breeze.
  • Hands-Free Cooking: Unlike the stovetop, where you need to watch and flip constantly, an air fryer allows you to step away while it works its magic.

Want to try other quick and delicious air fryer meals? Check out these Turkey Burgers in the Air Fryer for a healthy, flavorful option.

Ingredients and Tools You’ll Need

Essential Ingredients

Air Fryer Grilled Cheese

Recipe by [email protected]Course: Lunch, Dinner, SnackCuisine: AmericanDifficulty: Easy
Servings

2

servings
Prep time

5

minutes
Cooking time

8

minutes
Calories

400

kcal

Ingredients

  • 4 slices bread

  • 2 slices cheese

  • 2 tablespoons butter

Directions

  • Preheat your air fryer to 370°F (188°C). Meanwhile, spread butter evenly on one side of each slice of bread.
  • Place cheese slices between two pieces of bread with buttered sides facing out, forming a sandwich.
  • Shortly open the air fryer basket and place the sandwich inside. Close the basket and set the timer for 4 minutes.
  • After 4 minutes, carefully flip the sandwich using a spatula to ensure even crispiness on both sides.
  • Cook for an additional 3-4 minutes until the bread is golden brown and the cheese is melted inside.
  • Remove the sandwich from the air fryer using tongs, let it cool slightly, then slice it in half and serve.

Notes

  • Note About the Ingredients *-*
    When making air fryer grilled cheese, the quality of your ingredients can significantly impact the final result. Here are some tips to ensure your sandwich is top-notch:
    Bread: Opt for fresh, thick-cut bread like sourdough, multigrain, or brioche. Thicker slices hold up better in the air fryer and provide a satisfying crunch.
    Cheese: High-quality cheese makes a difference. Choose varieties that melt well, such as sharp cheddar, gouda, mozzarella, or Swiss. Pre-shredded cheese may contain anti-caking agents that affect melting.
    Butter or Mayonnaise: Use room-temperature butter for easy spreading, or try mayonnaise for a tangy twist and an even golden crust.
    These simple choices can take your grilled cheese from ordinary to extraordinary!
  • Bread: Thick-cut slices like sourdough, multigrain, or classic white bread work best. The thickness helps prevent the bread from getting too crispy or burnt.
  • Cheese: Sharp cheddar is a staple for grilled cheese, but feel free to experiment with gouda, mozzarella, pepper jack, or Swiss.
  • Butter or Mayonnaise: These fats give your sandwich that signature golden-brown crust. Mayonnaise can be a great alternative to butter and provides a tangy flavor.

For another easy-to-make air fryer recipe, check out these Air Fryer Artichoke Hearts for a light, crispy snack.

Optional Add-ons

Tools

  • Air Fryer: Any model will do, but a 3-quart or larger basket is ideal.
  • Silicone Spatula: Helps with flipping without scratching the air fryer basket.
  • Sharp Knife: For slicing ingredients and cutting the sandwich.

How to Make the Perfect Air Fryer Grilled Cheese

Follow these simple steps to achieve the perfect air fryer grilled cheese every time:

1. Preheat Your Air Fryer

  • Set your air fryer to 375°F (190°C). Preheating ensures the sandwich cooks evenly and crisps up perfectly.

2. Assemble the Sandwich

  • Apply a light coating of butter or mayonnaise to one side of each slice of bread.
  • Place one or two slices of your preferred cheese between the unbuttered sides of the bread. Feel free to add any extra fillings like tomatoes or bacon.

3. Cook the Sandwich

  • Place the sandwich in the air fryer basket with the buttered side facing out.
  • Cook for 3-4 minutes on one side, then flip and cook for another 1-2 minutes until the bread is golden brown and the cheese is melted.

4. Check and Serve

  • Check to make sure the cheese is fully melted and the bread is evenly toasted.
  • Let the sandwich sit for 1 minute before slicing to allow the cheese to set slightly.

For a fun appetizer to serve alongside your grilled cheese, try these Fried Ravioli in the Air Fryer for a crispy, cheesy snack.

Delicious Variations of Air Fryer Grilled Cheese

Take your grilled cheese to the next level with these fun and tasty variations:

  • Double Cheese Delight: Combine sharp cheddar with creamy brie or mozzarella for a rich and gooey melt.
  • Caprese Grilled Cheese: Add sliced tomatoes, fresh basil, and a drizzle of balsamic glaze for a gourmet twist.
  • Bacon Avocado Grilled Cheese: Add crispy bacon and slices of avocado for extra flavor and texture.
  • Spicy Pepper Jack: Use pepper jack cheese and add pickled jalapeños for a spicy kick.

Common Mistakes to Avoid

Even though making grilled cheese in an air fryer is simple, here are some mistakes to avoid:

  • Skipping Preheating: Preheating helps ensure even cooking and prevents the bread from toasting too quickly.
  • Overfilling the Sandwich: Too many fillings can prevent the sandwich from cooking evenly or result in soggy bread.
  • Not Flipping the Sandwich: Flipping helps achieve an even golden-brown crust on both sides.
  • Using Low-Quality Cheese: For the best melt, use high-quality cheese that doesn’t separate or become oily.

Nutritional Information

A classic air fryer grilled cheese contains approximately:

  • Calories: 395
  • Protein: 18g
  • Fat: 24g
  • Carbohydrates: 26g

Healthier Options

  • Use whole-grain bread instead of white bread.
  • Opt for reduced-fat cheese to lower the calorie count.
  • Replace butter with a light spray of olive oil.

Frequently Asked Questions (FAQs)

1. Can I Use Frozen Bread?

Yes! Just thaw it slightly or increase the cooking time by 1-2 minutes for even results.

2. What’s the Best Cheese for Melting?

Sharp cheddar, mozzarella, gouda, and pepper jack are excellent choices for a melty, gooey sandwich.

3. How Do I Reheat Grilled Cheese in an Air Fryer?

Reheat at 350°F (175°C) for 2-3 minutes to restore the crispy texture.

4. Can I Make Grilled Cheese Without Butter?

Absolutely! Use mayonnaise or a light spray of olive oil for a similar golden crust.


Perfect Pairings for Grilled Cheese

  • Tomato Soup: A classic comfort pairing that balances the richness of the sandwich.
  • Salads: A fresh arugula or Caesar salad complements the heaviness of the cheese.
  • Dips: Marinara sauce, ranch, or honey mustard make excellent dipping options.

Final Thoughts

Making a grilled cheese sandwich in an air fryer is a game-changer. It’s quick, easy, and produces consistent results with minimal effort. Whether you stick to the classic version or experiment with fun variations, the air fryer ensures a crispy, melty sandwich every time. Try it out, explore different cheeses and fillings, and enjoy this upgraded comfort food!

Happy air frying! 😊

Mushrooms in Air Fryer: Crispy and Delicious

Mushrooms in Air Fryer

Mushrooms have long been a favorite for adding flavor and texture to various dishes. Whether you’re incorporating them into a hearty pasta, tossing them into a salad, or adding them to your favorite stir-fry, mushrooms offer a rich, savory taste that’s hard to resist. But have you ever considered cooking mushrooms in air fryer? If not, you’re in for a treat!

Air frying mushrooms transforms them into a crispy, golden delight that retains all the natural flavors and nutrients. It’s a healthy, quick, and easy way to enjoy your mushrooms while avoiding the excess oil and fats that come with traditional frying. In this article, we’ll explore everything you need to know about making crispy, delicious mushrooms in air fryer, from the best types to use to simple, tasty recipes and tips for perfecting the technique.

Let’s dive in and discover why cooking mushrooms in air fryer should become your new go-to method!

Why Air Frying Mushrooms Is a Game Changer

The air fryer has become a kitchen essential for many people due to its ability to produce crispy, delicious dishes with little to no oil. If you haven’t used an air fryer yet, you’re missing out on one of the most efficient and versatile cooking methods available today. Here’s why air frying mushrooms is a game-changer:

The Magic of Air Frying

  • Quick Cooking Time: One of the main advantages of using an air fryer is the speed. Unlike traditional ovens, the air fryer uses hot air circulated at high speeds, cooking food in a fraction of the time. Mushrooms, in particular, cook quickly—usually in 8-12 minutes—without the need for preheating.
  • Crispy Texture: Air frying creates the perfect crispy texture on the outside of the mushrooms, while maintaining their tender, juicy interior. No more soggy mushrooms or deep-fried excess oil!
  • Healthier Option: Traditional frying often involves a lot of oil, which adds unnecessary calories and fat. Air frying requires little to no oil, making it a much healthier option. You can enjoy the crispy crunch of fried mushrooms without the guilt.
  • Retained Nutrients: Mushrooms are packed with important nutrients like Vitamin D, potassium, and B vitamins. Air frying helps retain these nutrients by reducing the need for excessive cooking time and high temperatures, unlike frying, which can cause the nutrients to break down.

Perfect for Mushrooms

  • Enhanced Flavor: Mushrooms naturally contain a high water content, which can make them soft and sometimes soggy when cooked using traditional methods. Air frying helps to draw out the moisture, resulting in a crispy, flavorful bite.
  • Versatility: Air frying works with a wide variety of mushroom types. Whether you’re using small button mushrooms or large portobello caps, the air fryer can handle them all, ensuring consistent and delicious results.

Best Mushrooms for Air Frying

Not all mushrooms are created equal, and some varieties work better in the air fryer than others. While you can technically air fry almost any type of mushroom, here are the best options for achieving crispy, golden perfection:

Button Mushrooms

Button mushrooms are among the most common types and are perfect for air frying. Their small size and tender texture allow them to cook quickly and evenly. They absorb seasoning well, making them incredibly flavorful after air frying.

Cremini Mushrooms

Cremini mushrooms are similar to button mushrooms but have a slightly deeper flavor. They are a great choice for air frying because they hold up well and turn beautifully crispy without drying out. Their earthy flavor pairs wonderfully with a variety of seasonings.

Portobello Mushrooms

Portobello mushrooms are larger and have a meaty texture, making them ideal for air frying if you want to create mushroom “steaks.” Their size and hearty flavor make them an excellent choice for those looking to replace meat in burgers or other dishes.

Shiitake Mushrooms

Shiitake mushrooms are known for their rich, umami flavor. These mushrooms are perfect for air frying, as their delicate texture crisps up beautifully while still preserving their savory taste. Shiitakes are also packed with health benefits, including immune-boosting properties.

Tip: Choose fresh mushrooms whenever possible. While frozen mushrooms can be air fried, fresh mushrooms generally yield better results, with a crispier texture and enhanced flavor.

How to Make Mushrooms Crispy in Air Fryer

Now that you’ve selected your mushrooms, it’s time to get cooking! Here’s a simple step-by-step guide to making perfectly crispy mushrooms in air fryer:

Step 1: Clean and Prepare the Mushrooms

  • Use a damp cloth or paper towel to gently wipe the mushrooms clean. Avoid rinsing them under water, as mushrooms tend to absorb moisture, which can lead to sogginess.
  • Depending on the size of the mushrooms, you can leave them whole, slice them, or remove the stems (if you’re using portobello mushrooms). Just make sure the pieces are of uniform thickness to ensure even cooking.

Step 2: Seasoning Your Mushrooms

Mushrooms are like sponges, and they absorb seasonings beautifully. Here’s a simple seasoning mix to enhance their natural flavor:

  • 1-2 tbsp olive oil
  • 1 tsp garlic powder
  • 1/2 tsp salt
  • 1/4 tsp black pepper

Feel free to experiment with other seasonings, such as paprika, thyme, rosemary, or even a sprinkle of parmesan cheese. You can also add a drizzle of balsamic vinegar for a tangy kick.

Step 3: Preheat Your Air Fryer

Preheating the air fryer helps ensure even cooking and crispy results. Set your air fryer to 375°F (190°C) and let it heat up for a few minutes before adding the mushrooms.

Step 4: Cook in the Air Fryer

Place your seasoned mushrooms in air fryer basket in a single layer. Avoid overcrowding the basket, as this can lead to uneven cooking. Cook at 375°F for about 8-12 minutes, depending on the size and type of mushrooms you’re using.

  • Shake halfway through the cooking process to ensure that the mushrooms cook evenly on all sides.
  • If you want extra crispiness, lightly spray the mushrooms with a bit more olive oil halfway through.

Pro Tip: If you’re cooking portobello mushrooms or larger mushroom caps, you may need to increase the cooking time slightly. You can also slice them into smaller pieces for quicker cooking.

Mushrooms in Air Fryer Recipe: Crispy and Savory

If you’re looking for a simple, delicious recipe to try, this one is a crowd-pleaser:

Ingredients:

Crispy Air Fryer Mushrooms 🍄✨

Recipe by [email protected]
Servings

4

servings
Prep time

10

minutes
Cooking time

12

minutes
Calories

150

kcal

Ingredients:

  • 8 oz (225 g) button mushrooms or baby bella mushrooms,

  • cleaned and stems trimmed

  • 1 cup panko breadcrumbs

  • 1/2 cup grated Parmesan cheese

  • 1 tsp garlic powder

  • 1/2 tsp smoked paprika

  • 1/2 tsp salt

  • 1/4 tsp black pepper

  • 2 large eggs

  • 1/2 cup all-purpose flour

  • Cooking spray

Directions

  • Prep the mushrooms: Gently clean the mushrooms with a damp cloth and trim any long stems. Ensure they are dry before coating.
  • Set up a coating station: In one bowl, place the flour. In a second bowl, whisk the eggs until smooth. In a third bowl, mix the panko breadcrumbs, Parmesan, garlic powder, paprika, salt, and black pepper.
  • Coat the mushrooms: Roll each mushroom in the flour, then dip it into the egg mixture, ensuring it’s fully coated. Finally, roll it in the breadcrumb mixture, pressing gently to adhere.
  • Preheat the air fryer: Set the air fryer to 375°F (190°C) and let it preheat for about 3 minutes.
  • Arrange mushrooms in the basket: Place the coated mushrooms in a single layer in the air fryer basket. Lightly spray them with cooking spray for extra crispiness. Work in batches if necessary.
  • Cook the mushrooms: Air fry for 10-12 minutes, shaking the basket halfway through, until the mushrooms are golden brown and crispy.
  • Serve: Remove from the air fryer and serve hot with your favorite dipping sauce, like ranch or garlic aioli.

Notes

  • Note:
    These crispy air-fried mushrooms are a healthier alternative to deep-fried snacks, perfect for a quick appetizer or side dish. If you prefer extra spice, add a pinch of cayenne pepper to the breadcrumb mixture. Enjoy the crunchy texture without the guilt!
    Bon appétit and happy cooking! 👩‍🍳🍽️

Benefits of Cooking Mushrooms in Air Fryer

Cooking mushrooms in air fryer isn’t just about making them crispy—it also offers a range of benefits that make it a superior choice for many home cooks:

Healthier Cooking

By using minimal oil, air frying allows you to enjoy mushrooms with fewer calories and less fat. It’s the perfect way to indulge in your favorite foods without compromising on your health goals.

Retained Nutrients

Mushrooms are a powerhouse of nutrients, and air frying helps preserve these essential vitamins and minerals. Unlike deep frying, which can strip nutrients from food, air frying maintains the integrity of the mushrooms, ensuring that you get all the benefits.

Time-Saving

Air frying is quick. You don’t need to spend long hours in the kitchen, waiting for the oven to preheat or standing by the stove. With the air fryer, you can have crispy, delicious mushrooms ready in just 10-15 minutes.

Air Fried Mushrooms as a Snack or Side Dish

Air-fried mushrooms aren’t just for main courses—they make a fantastic snack or side dish as well!

Snack Ideas:

  • Serve them with a dipping sauce such as garlic aioli, ranch dressing, or spicy sriracha mayo.
  • Pair them with a cold beverage for a healthy and satisfying snack.

Side Dish Ideas:

  • Serve your crispy mushrooms alongside grilled chicken, steak, or roasted vegetables for a complete meal.
  • Toss them into a salad for an added crunch or on top of a pizza for extra flavor.

Troubleshooting: Common Issues and How to Fix Them

While air frying is generally foolproof, there are a few common issues that may arise. Here’s how to troubleshoot them:

Mushrooms Too Soggy?

  • Ensure you’re not overcrowding the basket. This can trap moisture and prevent the mushrooms from crisping up.
  • Try increasing the cooking time slightly or reduce the amount of oil used.

Mushrooms Burned?

  • Reduce the cooking time or lower the temperature slightly. If needed, check the mushrooms halfway through cooking to prevent overcooking.

Mushrooms Not Crispy Enough?

  • Lightly spray the mushrooms with additional oil during cooking or increase the cooking time slightly. Ensure your air fryer is preheated to the correct temperature.

Frequently Asked Questions (FAQs)

Q: How long do mushrooms take in the air fryer?
A: Mushrooms generally take 8-12 minutes at 375°F in the air fryer. The exact time will vary depending on the type and size of the mushrooms.

Q: Can I use frozen mushrooms in air fryer?
A: While fresh mushrooms yield the best results, frozen mushrooms can be used. Just keep in mind that they may release more moisture, and you may need to adjust the cooking time.

Q: What types of mushrooms are best for air frying?
A: Button, cremini, shiitake, and portobello mushrooms all work well in air fryer. Each type has its unique flavor and texture, so choose one that suits your preferences.

Conclusion: Enjoy Crispy, Flavorful Mushrooms Anytime!

Now that you know how easy and delicious it is to cook mushrooms in air fryer, it’s time to start experimenting in your kitchen. Whether you’re craving a savory snack, a flavorful side dish, or a healthy addition to your meals, air-fried mushrooms are sure to satisfy your taste buds. With just a few simple steps, you can enjoy crispy, golden mushrooms without the hassle of traditional frying.

So, grab your mushrooms and air fryer, and get ready to enjoy a tasty treat that’s as nutritious as it is delicious. Your next culinary adventure is just a few minutes away!

By following this guide, you’re sure to create the best crispy mushrooms in air fryer every time. Don’t forget to share your creations with friends and family, and let them experience the magic of air-fried mushrooms!

Air Fryer Frozen Shrimp: Quick & Easy Recipe

air fryer frozen shrimp

If you’ve ever craved a satisfying, quick meal after a long day, but don’t have the time or energy to spend hours in the kitchen, then you’re in for a treat. The solution? Air fryer frozen shrimp! This quick and easy recipe transforms frozen shrimp into a crispy, flavorful dish with minimal effort. Whether you’re a busy professional, a parent on the go, or simply someone who appreciates a delicious meal that’s fast to prepare, air fryer shrimp is your go-to option. In this article, we’ll walk you through everything you need to know to make this tasty, healthy dish.

Why Air Fryer Frozen Shrimp Is the Ultimate Quick & Easy Meal

Let’s face it—life gets busy. But that doesn’t mean you have to settle for bland, uninteresting meals. Air fryer frozen shrimp offers a perfect solution. Here’s why it’s become such a popular option:

  • Time-Saving: Frozen shrimp cook directly from the freezer, so there’s no need to thaw them. In as little as 10 minutes, you’ll have a crispy, golden-brown meal ready to serve.
  • Crispy Texture Without Deep Frying: One of the best things about air fryers is that they give food that perfect crispy exterior without the need for excessive amounts of oil. The air fryer’s circulation technology cooks shrimp evenly, providing a satisfying crunch while maintaining a tender inside.
  • Healthier Option: Because air fryers require little to no oil, they’re a healthier choice compared to traditional frying methods. You’ll still get that crunchy texture, but with far less fat.
  • Endless Flavor Combinations: The versatility of air fryer shrimp is endless. Whether you prefer them spicy, smoky, or garlicky, you can customize the seasoning to your tastes and dietary preferences. And, since they cook so quickly, you can experiment with different spices to find your perfect combination.

What You’ll Need to Make Air Fryer Frozen Shrimp

Before you dive into cooking, it’s important to know exactly what you’ll need to prepare this dish. Don’t worry—this recipe is as simple as it gets.

Ingredients

Air Fryer Frozen Shrimp 🍤🔥

Recipe by [email protected]
Servings

4

servings
Prep time

5

minutes
Cooking time

10

minutes
Calories

120

kcal
Total time

15

minutes

This recipe doesn’t contain pork or alcohol.
Hi there, food lover! 👋 Ready to turn that bag of frozen shrimp into a quick and delicious meal? Let’s get started with this easy air fryer recipe! 🍤✨

Ingredients

  • 1 lb (450 g) frozen shrimp (peeled, deveined, tail-on or off, your choice)

  • 2 tbsp olive oil

  • 1 tsp garlic powder

  • 1 tsp paprika (or smoked paprika for extra flavor)

  • 1/2 tsp salt

  • 1/4 tsp black pepper

  • Optional: Lemon wedges and fresh parsley for garnish

Directions

  • Preheat the air fryer: Set your air fryer to 400°F (200°C) and let it preheat for 5 minutes.
  • Prepare the shrimp: Place the frozen shrimp in a bowl (no need to thaw). Drizzle with olive oil and toss with garlic powder, paprika, salt, and pepper until evenly coated.
  • Arrange in the air fryer: Spread the shrimp in a single layer in the air fryer basket. Avoid overcrowding to ensure even cooking—cook in batches if necessary.
  • Cook the shrimp: Air fry for 8-10 minutes, shaking the basket halfway through. The shrimp should be pink, opaque, and lightly crispy around the edges when done.
  • Serve and enjoy: Remove the shrimp from the air fryer and garnish with fresh parsley and a squeeze of lemon for extra brightness. Serve as a snack, salad topping, or alongside your favorite dipping sauce.

Notes

  • If your frozen shrimp are pre-cooked, reduce the air frying time to 5-6 minutes, as you’re only reheating them. For extra crispiness, add a light sprinkle of cornstarch to the seasoning mix. Also, always check for doneness—shrimp cook quickly and can turn rubbery if overcooked!
    Let me know if you’d like more tips or variations! 😊🍤

Kitchen Tools You’ll Need

  • Air Fryer: Of course, the star of the show! Choose a reliable air fryer with a basket for even cooking.
  • Tongs or Spatula: To flip the shrimp halfway through cooking for even crispiness.
  • Small Bowl: For mixing your seasoning and tossing the shrimp.
  • Cooking Spray: This ensures your shrimp doesn’t stick to the air fryer basket, giving you an even crisp.

Step-by-Step Guide to Cooking Air Fryer Frozen Shrimp

Now that you have everything ready, let’s dive into the process. The steps are simple, fast, and foolproof. Here’s how to cook your frozen shrimp in the air fryer:

Preparing the Shrimp

  1. Preheat the Air Fryer: First, preheat your air fryer to 400°F (200°C) for about 5 minutes. This helps the shrimp cook evenly from the moment you place them in the basket.
  2. Season the Shrimp:
    • Place the frozen shrimp in a bowl (no need to thaw).
    • Lightly drizzle olive oil over the shrimp or spray them with a cooking spray. This helps the seasoning adhere and gives them that golden crispiness.
    • Sprinkle garlic powder, paprika, salt, and pepper over the shrimp. Toss them well to make sure the shrimp is evenly coated with the seasonings. This will make every bite burst with flavor.

Cooking the Shrimp

  1. Arrange Shrimp in the Air Fryer Basket: Lay the seasoned shrimp in a single layer in the air fryer basket. Avoid overcrowding to ensure they cook evenly. You can cook the shrimp in batches if needed.
  2. Set the Timer: Cook the shrimp for about 8-10 minutes. Halfway through the cooking time, shake the basket or use tongs to flip the shrimp for even crispiness. This is essential to achieve that perfect texture.
  3. Check for Doneness: After 8-10 minutes, the shrimp should be golden and crispy on the outside, with an opaque and juicy interior. If they need more time, add another 1-2 minutes until they are done.

Serving Suggestions

  • Dip It: Air fryer shrimp goes perfectly with a variety of dipping sauces. Try cocktail sauce, spicy aioli, or a simple squeeze of lemon.
  • Pair It: Pair your shrimp with a side of roasted vegetables, a fresh salad, or fluffy rice. For a heartier meal, serve it alongside pasta or quinoa.

Tips for Perfect Air Fryer Frozen Shrimp Every Time

Want to ensure your shrimp always turns out perfect? Here are some helpful tips for getting the best results:

  • Don’t Overcrowd the Basket: The air fryer works best when there’s enough space for air to circulate around the food. If the shrimp are too crowded, they’ll steam instead of crisping up. Work in batches if needed.
  • Use High-Quality Shrimp: While frozen shrimp are convenient, try to choose a good quality product for the best taste. Larger shrimp tend to have a better texture when cooked in the air fryer.
  • Customize the Seasonings: Feel free to experiment with different seasonings and spices. Lemon pepper, Cajun seasoning, or even chili flakes can add a bold new twist to your shrimp.
  • Flip the Shrimp Halfway Through: Shaking the basket or flipping the shrimp during cooking ensures they cook evenly on both sides.
  • Don’t Skip the Oil: While you don’t need much, a light coating of oil or cooking spray is essential for getting the shrimp crispy. You can use olive oil, avocado oil, or even spray the basket with a non-stick cooking spray.

Frequently Asked Questions About Air Fryer Frozen Shrimp

Can I cook frozen shrimp in the air fryer without thawing?

Yes, you can cook frozen shrimp straight from the freezer without any need for thawing. This is one of the biggest benefits of using an air fryer. It’s quick and easy!

How do I prevent shrimp from sticking in the air fryer?

To prevent shrimp from sticking to the air fryer basket, lightly spray it with oil before cooking. You can also toss the shrimp in a small amount of oil before placing them in the basket.

How long do I cook frozen shrimp in the air fryer?

Frozen shrimp will typically take 8-10 minutes at 400°F (200°C) in the air fryer. However, cooking times may vary based on the size of the shrimp and the specific model of your air fryer, so be sure to check for doneness.

What can I serve with air fryer frozen shrimp?

Air fryer shrimp is incredibly versatile and can be paired with a variety of sides. Try serving it with a side of rice, fresh salad, roasted vegetables, or even pasta. You can also make a shrimp taco bowl or use it as a topping for a seafood pasta dish.

Conclusion: Why Air Fryer Frozen Shrimp Is the Best Weeknight Dinner

When you’re pressed for time but still want something delicious, air fryer frozen shrimp is the answer. This quick and easy recipe ensures you can enjoy crispy, flavorful shrimp without all the hassle. You’ll save time, reduce fat, and enjoy a meal that’s just as good as the ones served in your favorite restaurant. Whether you’re cooking for one or feeding the whole family, this dish delivers every time.

So, the next time you’re looking for a hassle-free meal, grab some frozen shrimp, fire up the air fryer, and enjoy a crispy, savory treat that’s ready in no time!

Now that you know how to make perfect air fryer frozen shrimp, it’s time to give it a try. Why not experiment with different seasonings and dipping sauces to make it your own? Share your experience with us in the comments below, or let us know your favorite side dish to serve with shrimp. Don’t forget to subscribe for more easy and delicious recipes delivered right to your inbox!

How To make A perfect turkey burgers in air fryer

turkey burgers in air fryer

If you’re looking for a healthier, juicier, and quicker alternative to traditional beef burgers, turkey burgers in air fryer are a game changer. Whether you’re cooking for yourself, your family, or hosting a small gathering, the air fryer method guarantees delicious results every time—crispy on the outside, tender on the inside. Let’s dive into how you can make the perfect turkey burgers in air fryer that’s not only flavorful but easy to prepare!

Why Cook Turkey Burgers in Air Fryer?

The air fryer is a kitchen marvel, offering crispy, golden foods with less oil and minimal cleanup. But why choose it for turkey burgers? There are a few compelling reasons why the air fryer is your best bet for creating the juiciest turkey burgers:

  • Speedy Cooking: Air fryers cook food faster than conventional ovens or stovetops. This means you can get your turkey burgers ready in no time—ideal for busy weeknights or when you’re craving a quick bite.
  • Healthier Alternative: By using less oil, air fryers reduce the overall fat content of your burgers. The circulating hot air ensures that your turkey burgers cook evenly and stay moist without the need for excess fats.
  • Crispiness: Achieving that golden, crispy exterior can be tricky with lean ground turkey, but the air fryer makes it easy. The hot air crisps up the surface of the burgers, while keeping the inside juicy and tender.
  • Minimal Cleanup: Unlike grilling or stovetop frying, the air fryer doesn’t leave behind messy grills or greasy pans. The basket is easy to clean, and you won’t have to worry about any lingering odors.

When you use an air fryer for your turkey burgers, you’re not just simplifying the cooking process—you’re elevating the overall taste and texture. The results are undeniably delicious!

Ingredients for Perfect Air Fryer Turkey Burgers

Before we get started, let’s take a look at the key ingredients you’ll need to make your Turkey Burgers in Air Fryer. The beauty of this recipe lies in its simplicity—no fancy, hard-to-find ingredients required!

Essential Ingredients:

  • Ground Turkey: The star of the show! For the best results, opt for 90% lean ground turkey. It’s lean enough to keep the burgers healthy but still provides enough fat for flavor and juiciness.
  • Breadcrumbs: They help bind the turkey together, making the patties firm yet tender. Panko breadcrumbs are ideal since they add a light, airy texture to your burger.
  • Egg: This ingredient helps bind everything together while keeping your burger patties from falling apart.
  • Seasonings: A simple mix of salt, pepper, garlic powder, and onion powder enhances the flavor without overpowering the turkey’s natural taste. Feel free to experiment with additional seasonings like paprika, thyme, or cumin to add extra layers of flavor.
  • Olive Oil: A light mist or brush of olive oil helps achieve a crisp exterior while keeping the burger moist inside.

Turkey Burger Ingredient Table:

IngredientAmountNotes
Ground Turkey1 lb (16 oz)90% lean or higher preferred
Breadcrumbs1/4 cupPanko breadcrumbs work best
Egg1 large
Garlic Powder1 tspOptional: Adjust to your taste
Onion Powder1 tsp
Olive OilLight sprayFor crisping the outside of the burger

Step-by-Step Guide to Making Air Fryer Turkey Burgers

Now that you have all your ingredients ready, it’s time to put them together and create a mouthwatering turkey burger. The process is simple and easy, and we’ll guide you through every step.

Step 1 – Prepare the Turkey Burger Mixture

The first step is to make the burger mixture. You want to ensure everything is combined evenly without overmixing the ingredients.

  1. Mix Ground Turkey and Dry Ingredients: In a large bowl, add your ground turkey, breadcrumbs, garlic powder, onion powder, salt, and pepper.
  2. Add the Egg: Crack the egg into the bowl and gently mix it with your hands or a spoon. Be careful not to overmix—the goal is to just combine everything without compacting the mixture too much.
  3. Customize: If you’d like, you can add other flavorings to your burger mixture. Try adding fresh herbs like chopped parsley, or a teaspoon of Dijon mustard for a tangy kick. The beauty of making your own turkey burgers is the flexibility to adjust the flavor to suit your taste.

Step 2 – Shape the Patties

Once your mixture is ready, it’s time to form the patties.

  1. Portion the Mixture: Divide the mixture into even portions. Aim for about 4-ounce patties. You can make them larger or smaller depending on your preference.
  2. Shape the Patties: Gently shape each portion into a round patty. Press down lightly in the center to create a slight indentation—this will prevent the burgers from puffing up too much during cooking.
  3. Optional: If you’re cooking multiple burgers, it’s a good idea to place a piece of parchment paper between the patties to prevent them from sticking together.

Step 3 – Preheat the Air Fryer

While you’re shaping the patties, preheat your air fryer to 375°F (190°C) for about 5 minutes. Preheating ensures even cooking and helps the burgers develop that perfect crispy texture.

  1. Lightly Oil the Basket: Spray the air fryer basket with olive oil or use a brush to lightly coat it. This prevents the burgers from sticking and helps them crisp up nicely.

Step 4 – Cook the Turkey Burgers

It’s time to cook your turkey burgers! Place the patties in the air fryer basket, making sure there’s enough space between them for the hot air to circulate.

  1. Cook at 375°F (190°C): Set your air fryer to 375°F (190°C) and cook the turkey burgers for 10-12 minutes.
  2. Flip Halfway: After about 5-6 minutes, flip the patties over to ensure they cook evenly on both sides.
  3. Check Doneness: Use a meat thermometer to check the internal temperature of the burgers. They should reach 165°F (74°C) for safe consumption. If they need more time, air fry them for another 2-3 minutes.

Tips for Making the Best Turkey Burgers in Air Fryer

To ensure your turkey burgers come out perfectly every time, here are some helpful tips:

1. Don’t Overmix the Meat

When you mix the turkey with the breadcrumbs and seasonings, be sure not to overwork the meat. Overmixing can lead to tough burgers. The key is to gently mix until the ingredients are just combined.

2. Add Moisture to Keep Burgers Juicy

Turkey can dry out easily, so adding moisture is essential. Consider incorporating finely grated zucchini or a small amount of Greek yogurt into the mixture for added moisture and tenderness.

3. Use a Meat Thermometer

Using a meat thermometer is the best way to ensure your turkey burgers are cooked through but not overdone. The turkey should reach an internal temperature of 165°F (74°C).

4. Don’t Overcrowd the Basket

Air fryers work best when there’s enough space for the hot air to circulate. Avoid overcrowding the basket. If you’re cooking multiple patties, do so in batches.

Creative Variations for Air Fried Turkey Burgers

While the classic turkey burger is always a hit, sometimes it’s fun to mix things up. Here are a few creative variations to try in your air fryer:

1. Avocado Turkey Burger

Top your turkey burger with creamy slices of fresh avocado, a squeeze of lime, and a sprinkle of cilantro. This adds a fresh, rich flavor that pairs beautifully with the lean turkey.

2. BBQ Turkey Burger

Brush your turkey burger with tangy BBQ sauce in the last few minutes of cooking. The result is a juicy, flavorful burger with a smoky twist.

3. Mediterranean Turkey Burger

Mix chopped spinach, crumbled feta cheese, and a sprinkle of oregano into the turkey mixture for a Mediterranean-inspired burger. Top it with tzatziki sauce for an added punch.

Serving Suggestions for Air Fryer Turkey Burgers

Once your turkey burgers are perfectly cooked, it’s time to serve them! Here are some great sides and toppings to make your meal complete:

  • Sweet Potato Fries: Air-fry some sweet potato fries alongside your turkey burgers for a satisfying, crispy side.
  • Side Salad: A simple green salad with a tangy vinaigrette adds freshness and balance to the meal.
  • Coleslaw: Add a crunchy, tangy side that pairs perfectly with the rich flavors of the turkey burger.

Common Mistakes to Avoid When Cooking Turkey Burgers in Air Fryer

Even seasoned cooks can make mistakes! Here are a few things to watch out for when preparing turkey burgers:

1. Using Too Lean of Turkey

Turkey burgers made with very lean ground turkey (like 99%) can be dry. Opt for 90% lean turkey for the best balance of flavor and moisture.

2. Not Preheating the Air Fryer

Preheating the air fryer is essential to ensure even cooking. Skipping this step can lead to uneven results.

3. Overcrowding the Air Fryer Basket

Air fryers need space for the hot air to circulate around the food. If you overcrowd the basket, your burgers will cook unevenly and might not get as crispy.

FAQ – Making Perfect Turkey Burgers in Air Fryer

Q: Can I cook frozen Turkey Burgers in Air Fryer?
Yes, you can! Simply add a few extra minutes to the cooking time to ensure they reach the proper internal temperature.

Q: What can I add to my turkey burger mix to keep them moist?
Adding grated vegetables like zucchini, or a spoonful of Greek yogurt, can help keep your turkey burgers moist and flavorful.

Q: Can I make turkey burgers ahead of time?
Absolutely! You can shape the patties ahead of time and store them in the fridge for up to 24 hours or freeze them for later.

Conclusion: Enjoy Your Perfect Turkey Burgers in Air Fryer

Now that you have all the tips and tricks for making perfect turkey burgers in an air fryer, it’s time to enjoy the delicious results! With the right ingredients, a little know-how, and your trusty air fryer, you can make juicy, flavorful turkey burgers every time. Whether you’re cooking for yourself or feeding a crowd, this method guarantees success—crispy on the outside, tender and juicy on the inside.

So, grab your ground turkey, preheat that air fryer, and enjoy a healthier, quicker, and tastier burger tonight! Don’t forget to share your results with friends and family, and experiment with different toppings and seasonings to make each burger your own.

Ready to give it a try? Fire up your air fryer and start cooking!

how to cook a perfect corn dog in air fryer

corn dog in air fryer

Introduction: Satisfy Your Craving with the Perfect Corn Dogs in Air Fryer

We’ve all had that moment when a deep craving for a deliciously crispy corn dog strikes. Whether it’s for a snack, a quick meal, or a nostalgic taste of fair food, the classic corn dog delivers. But what if you could enjoy this iconic treat without the greasy mess of deep frying? That’s where the air fryer comes in.

Cooking a corn dog in air fryer takes just a few minutes and results in a perfectly crispy, golden exterior and a juicy, flavorful interior. No oil splatters, no heavy frying—just a simple, healthier version of a beloved snack. If you’re looking to master the art of air frying corn dogs, you’ve come to the right place.

In this article, you’ll learn everything you need to know about cooking the perfect corn dog in air fryer. We’ll break down the process step-by-step, offer tips for achieving the crispiest results, and answer your most common questions. By the end of this guide, you’ll have the knowledge to create the ultimate corn dog every time.

What You Need to Know About Cooking corn dog in air fryer

Cooking corn dog in air fryer is a game-changer. Not only is it faster and healthier than traditional frying, but it also gives you that perfect crispy coating you crave, without the added oil. Here’s why the air fryer is the best tool for cooking corn dogs:

Benefits of Using an Air Fryer for Corn Dogs

  1. Quick and Convenient
    The air fryer cuts down the cooking time significantly. A typical corn dog will be done in just 8-10 minutes. This is a huge time-saver compared to traditional frying methods, which often take longer and require more preparation.
  2. Healthier Cooking
    One of the biggest advantages of using an air fryer is the reduction in oil. Unlike deep frying, which submerges the corn dog in oil, the air fryer uses hot air to create a crispy texture, making it a much healthier option. You’ll still get that satisfying crunch, but without all the excess fat.
  3. Even Cooking
    Air fryers circulate hot air evenly around the food, ensuring that every inch of your corn dog is cooked to perfection. You won’t have to worry about some parts being soggy or undercooked.
  4. No Mess or Smell
    With air frying, there’s no hot oil splattering, and you won’t be left with a lingering greasy smell. It’s a cleaner, hassle-free cooking method that’s perfect for those who want to keep things simple.

Ingredients for the Perfect Corn Dog

The beauty of cooking corn dog in air fryer is how easy it is to prepare them. Whether you’re using frozen corn dogs or making your own from scratch, the ingredients are simple. Here’s what you’ll need:

Essential Ingredients

  • Frozen Corn Dogs: The easiest way to make corn dog in air fryer is to use frozen ones. They’re pre-cooked, so all you need to do is reheat them to get that crispy exterior. Choose your favorite brand or variety (mini corn dogs, regular, or even gourmet ones) for the best results.
  • Cooking Spray: While not absolutely necessary, a light spray of cooking oil can help your corn dogs get that extra golden, crispy texture. A quick spritz of olive oil or avocado oil works wonders.

Optional Ingredients

  • Seasonings: For added flavor, you can sprinkle a bit of garlic powder, smoked paprika, or cayenne pepper on your corn dogs before cooking. These will enhance the taste without overpowering the classic corn dog flavor.
  • Dipping Sauces: No corn dog is complete without the right sauce. Ketchup, mustard, honey mustard, or even spicy mayo can all make for the perfect dip.

Step-by-Step Instructions for Cooking a corn dog in air fryer

Now that you have your ingredients ready, it’s time to start cooking! Follow these simple steps to achieve the perfect corn dog in your air fryer.

Preheat Your Air Fryer

Before you start cooking, it’s important to preheat your air fryer to ensure even cooking. Set your air fryer to 370°F (190°C) and allow it to heat up for 3-5 minutes. Preheating will help create the ideal crispiness without overcooking the interior.

Preparing the Corn Dogs

  • Frozen Corn Dogs: No need to thaw them—just take the corn dogs out of the freezer and place them directly in the air fryer basket.
  • Fresh Corn Dogs: If you’re using homemade or fresh corn dogs, ensure they’re fully coated in the batter and frozen before cooking. This helps them cook evenly and achieve the crispy texture.

Optionally, spray a light coat of cooking spray on the corn dogs to enhance crispiness. This is especially helpful if you’re using low-fat or fat-free frozen corn dogs that may not crisp up as much on their own.

Cooking the Corn Dogs

  1. Place the corn dog in air fryer: Arrange the corn dogs in a single layer in the air fryer basket. Be careful not to overcrowd the basket, as this can affect the air circulation and result in uneven cooking.
  2. Cook at 370°F (190°C) for 8-10 minutes. Flip the corn dogs halfway through the cooking time to ensure they cook evenly on all sides.
  3. Check for Crispiness: After the cooking time is up, check to make sure the corn dogs are golden brown and crispy. If you want them even crispier, add an extra 1-2 minutes.
  4. Serve and Enjoy: Once cooked to perfection, remove the corn dogs from the air fryer. Let them cool for a minute before serving.

Tips for the Perfect Corn Dog Every Time

To ensure that your corn dogs come out crispy, golden, and delicious every time, here are some expert tips:

Adjusting for Size and Thickness

  • Mini Corn Dogs: If you’re cooking mini corn dogs, they will cook faster than full-sized ones. Start checking at around 6-7 minutes to avoid overcooking.
  • Thicker Corn Dogs: If your corn dogs are on the thicker side, you may need to add an extra minute or two to ensure they’re fully heated through.

How to Achieve Extra Crispy Corn Dogs

  • Spray with Oil: Lightly spraying your corn dogs with a cooking spray before cooking can help them get extra crispy.
  • Flip Halfway Through: To ensure an even, golden-brown exterior, flip your corn dogs halfway through the cooking process.

Air Fryer Temperature Settings for Corn Dogs

  • Optimal Temperature: 370°F (190°C) is the ideal temperature for cooking corn dogs. It’s hot enough to crisp the exterior without burning it while leaving the inside juicy and tender.

Common Mistakes to Avoid

Even though air frying is a simple method, there are still a few common mistakes you’ll want to avoid:

Overcrowding the Basket

Air fryers rely on air circulation to cook food evenly. Overcrowding the basket can prevent the hot air from reaching all parts of the corn dogs, leading to uneven cooking. Always leave space between each corn dog for the best results.

Not Preheating the Air Fryer

Skipping the preheating step can lead to uneven cooking and a less crispy texture. Preheating ensures that your corn dogs start cooking as soon as they hit the basket.

Not Checking for Crispiness

Corn dogs may need an extra minute or two to achieve that perfect crunch. If you like them extra crispy, don’t be afraid to cook them a little longer.

Serving Suggestions and Pairing Ideas

While corn dogs are delicious on their own, they can be even better when paired with the right sides and dipping sauces. Here are a few ideas:

Dipping Sauces

  • Ketchup: Classic and simple.
  • Mustard: A tangy option that pairs perfectly with the sweetness of the corn batter.
  • Honey Mustard: For a sweet and savory combo.
  • Spicy Mayo: For those who like a little kick.
  • Barbecue Sauce: For a smoky flavor.

Side Dishes

  • Fries: Keep the fair food theme going with some crispy fries.
  • Coleslaw: A cool, creamy contrast to the hot, crispy corn dog.
  • Pickles: Tangy pickles are a great side for corn dogs.
  • Fresh Salad: For a light and refreshing side that balances out the meal.

FAQ: Everything You Need to Know About Cooking corn dog in air fryer

Can I cook frozen corn dog in air fryer?
Yes! Air fryers work great with frozen corn dogs. There’s no need to thaw them—just pop them in and follow the cooking instructions.

How do I prevent my corn dog from getting soggy?
Make sure to preheat your air fryer, don’t overcrowd the basket, and lightly spray the corn dogs with oil. This will help them cook evenly and achieve a crispy texture.

How long should I cook corn dog in air fryer?
Corn dogs typically take 8-10 minutes at 370°F (190°C). Be sure to flip them halfway through to ensure even cooking.

Can I cook homemade corn dog in air fryer?
Absolutely! If you’ve made homemade corn dogs, make sure they’re frozen before cooking. This helps them cook evenly and get that crispy exterior.

Conclusion: Enjoy the Crispy Perfection of Corn Dogs in Your Air Fryer

Cooking corn dog in air fryer is a simple, fast, and healthy way to enjoy this classic snack. Whether you’re using frozen or homemade corn dogs, the air fryer ensures crispy, golden results every time. With just a few easy steps and a little know-how, you can enjoy your corn dogs in minutes—no greasy oil or long waits involved.

Now that you know how to make the perfect corn dog in air fryer, it’s time to put your new skills to the test. Don’t forget to experiment with different seasonings, sauces, and sides to create the ultimate corn dog experience. Enjoy!

Ready to try it yourself? Grab some corn dogs and fire up your air fryer today!

How To make A Perfect breaded shrimp in air fryer

breaded shrimp in air fryer

Craving the crispy, flavorful crunch of breaded shrimp in air fryer without the extra calories of deep frying? The air fryer is your solution! Enjoy perfectly cooked, golden shrimp with a crispy coating and a healthier twist. Follow this guide for easy, restaurant-quality shrimp at home.

Why Air Frying is the Best Method for Breaded Shrimp

Air frying has taken the kitchen world by storm, and for good reason. While traditional frying relies on hot oil to cook food, an air fryer uses circulating hot air to achieve a similar effect. The result? Crispy, evenly cooked breaded shrimp in air fryer with less oil and fewer calories.

Benefits of Using an Air Fryer for Shrimp

  • Healthier Option: Traditional frying can add hundreds of calories and grams of fat to your meal. In contrast, air frying uses a fraction of the oil, keeping the calories lower while still giving you that desired crispy texture.
  • Convenience and Cleanup: Air fryers are designed for quick, easy cooking. Plus, cleanup is a breeze—no messy oil splatters, and most air fryer baskets are dishwasher safe.
  • Flavor Preservation: Air fryers cook evenly, meaning your shrimp will have a consistent flavor and texture, without the risk of burnt spots or undercooked bites.

Whether you’re already a fan of air frying or new to it, you’ll find that it’s an ideal method for achieving delicious breaded shrimp in air fryer with minimal effort and maximum taste.

Ingredients Needed for breaded shrimp in air fryer

Before diving into the steps, let’s cover the ingredients you’ll need to make perfect air-fried breaded shrimp. By keeping a few key ingredients on hand, you can whip up this meal anytime the craving strikes.

Fresh or Frozen Shrimp? What You Need to Know

For the best results, fresh shrimp is generally recommended. It has a sweeter flavor and firmer texture, perfect for holding onto breading. However, if frozen shrimp is what you have, it can still work well. Be sure to thaw it properly to avoid any excess moisture that might prevent the breading from sticking.

Essential Seasonings and Coating Options

To achieve a flavorful, crispy coating, you’ll want to set up a basic breading station with the following:

  • All-purpose flour: This is your base for the breading and helps the other layers stick.
  • Egg: A beaten egg acts as the “glue” that binds the breadcrumbs to the shrimp.
  • Breadcrumbs: You can use regular or panko breadcrumbs; panko gives an extra crunch, which is ideal for air frying.

For seasoning, simple spices can make a big difference:

  • Paprika: Adds a subtle warmth and a hint of color.
  • Garlic powder: For a mild, savory flavor.
  • Salt and pepper: Enhances the overall taste of the shrimp.

If you’re looking for a twist, consider adding herbs or a dash of cayenne for some heat.

Optional Ingredients for Healthier or Gluten-Free Alternatives

If you’re seeking a lighter or gluten-free version, there are easy swaps to consider:

  • Gluten-free breadcrumbs or almond flour can replace traditional breadcrumbs, making this recipe suitable for a gluten-free diet.
  • For a low-carb option, try using crushed pork rinds or almond flour instead of breadcrumbs.

These options may create a slightly different texture but can still deliver delicious results.

Step-by-Step Guide to Making Breaded Shrimp in Air Fryer

Ready to get cooking? Follow these step-by-step instructions, and you’ll be enjoying your perfect breaded shrimp in air fryer in no time.

Step 1 – Preparing the Shrimp

Start by peeling and deveining the shrimp. If your shrimp are frozen, thaw them by running cold water over them for a few minutes. Once thawed, pat them dry with a paper towel—this is essential to help the breading adhere better.

Step 2 – Breading the Shrimp

Set up a breading station with three separate bowls:

  1. Flour: Coat each shrimp lightly with flour, shaking off any excess.
  2. Egg: Dip each floured shrimp into the beaten egg, ensuring it’s fully coated.
  3. Breadcrumbs: Roll the shrimp in breadcrumbs, pressing gently to ensure they stick.

This multi-step process is key for achieving a solid breading layer that stays crispy.

Step 3 – Preheating and Setting Up the Air Fryer

Preheat your air fryer to 400°F (200°C) for about 3-5 minutes. Preheating helps the shrimp cook evenly and gives them a nice, crispy finish.

Step 4 – Cooking the Shrimp

Place the breaded shrimp in air fryer in a single layer in the air fryer basket. To ensure each piece cooks evenly, avoid stacking or overcrowding the basket. Cook for 6-8 minutes, flipping halfway through for even browning. The shrimp are done when they’re firm, opaque, and golden brown.

Step 5 – Finishing Touches

Once the shrimp are done, consider adding a squeeze of lemon or a sprinkle of fresh parsley. For added flavor, serve with dipping sauces like tartar, aioli, or a spicy mayo.

Recipe Table for Air Fryer Breaded Shrimp

Here’s a quick reference for the ingredients you’ll need:

IngredientQuantityNotes
Fresh Shrimp1 lbPeeled and deveined
All-Purpose Flour½ cupFor initial dredging
Egg1, beatenHelps breadcrumbs stick
Breadcrumbs1 cupPanko for extra crispiness
Paprika½ tspAdds color and flavor
Garlic Powder½ tspOptional, for added taste
Salt & PepperTo tasteFor seasoning shrimp
Olive Oil SprayFor air fryer basketEnsures a non-stick, crispy finish

This table can be a helpful guide for setting up your breading station and gathering the essentials.

Pro Tips for Perfect Air Fryer Breaded Shrimp

Achieving perfection with air-fried breaded shrimp in air fryer is easy if you keep a few pro tips in mind:

Avoid Overcrowding the Basket

To get a crispy result, it’s essential not to overcrowd the air fryer basket. Too many shrimp in the basket can lead to uneven cooking and reduce that desirable crunch. Arrange shrimp in a single layer with a little space between each piece.

Use a Light Oil Spray for Maximum Crispiness

A light spray of oil on the shrimp before cooking helps to enhance the browning and crispiness of the breading. Choose oils with a high smoke point, like olive or avocado oil, which work well in air fryers.

How to Prevent Breading from Falling Off

To keep your breading intact, pat the shrimp dry before starting, and gently press the breadcrumbs onto each piece. Additionally, avoid turning the shrimp too early in the cooking process; give it a few minutes for the breading to set.

Frequently Asked Questions (FAQ)

Can I cook frozen breaded shrimp in air fryer?
Absolutely! Pre-breaded frozen shrimp can be cooked directly in the air fryer. Set the temperature to 400°F and cook for 8-10 minutes, shaking the basket halfway through.

How long should I cook breaded shrimp in air fryer?
Typically, breaded shrimp in air fryer will take 6-8 minutes at 400°F. However, the exact time may vary depending on the size of the shrimp and the power of your air fryer.

What temperature should I use for air frying breaded shrimp?
A temperature of 400°F (200°C) is recommended for a golden, crispy result.

Are there healthier alternatives to traditional breadcrumbs?
Yes! For a gluten-free or low-carb version, try using almond flour, crushed pork rinds, or gluten-free breadcrumbs. Each of these alternatives provides a unique texture and flavor.

Can I reheat breaded shrimp in air fryer?
Yes, reheating in the air fryer is quick and will maintain the shrimp’s crispiness. Set the air fryer to 350°F and cook for about 3-4 minutes.

Conclusion – Enjoy Your Perfectly Crispy Breaded Shrimp!

With the air fryer, achieving that perfect, golden breaded shrimp in air fryer is easier and healthier than ever. In just a few minutes, you can enjoy this delicious seafood treat with a fraction of the oil and calories. Experiment with different seasonings, dipping sauces, or garnish ideas to make this recipe your own. Don’t forget to share your experience or tag friends who might love this recipe – happy air frying!

How To Make A Perfect roasted garlic air fryer

roasted garlic air fryer

There’s nothing quite like the aroma of roasted garlic air fryer filling your kitchen. It’s one of those simple yet transformative ingredients that can elevate your cooking in just minutes. But what if you could enjoy the same rich, caramelized flavor without waiting for an oven to preheat for ages? Enter the air fryer: your new best friend for making roasted garlic quickly and effortlessly.

This guide will show you how to make roasted garlic air fryer, step-by-step, giving you all the tips, tricks, and essential details needed to master this flavorful addition to any dish. Whether you’re a seasoned chef or just getting started, this article will show you the easiest and most effective way to roast garlic in your air fryer.

By the end of this guide, you’ll have the perfect roasted garlic to use in a variety of dishes, from pastas to spreads, and you’ll never look at garlic the same way again.

Why Roasted Garlic Air Fryer?

You might be wondering, “Why should I use an air fryer to roast garlic instead of the traditional oven method?” The oven does a great job, no doubt, but the air fryer has several advantages that make it the perfect tool for roasting garlic.

1. Time-Saving

When you roast garlic in an oven, it typically takes 30-40 minutes, not to mention the time it takes for the oven to preheat. With the air fryer, you can cut that time in half, making it a perfect solution for busy weeknights or last-minute cooking.

2. Even Roasting

The air fryer uses circulating hot air, which means that the garlic roasts evenly from all sides. You’ll avoid the uneven browning and burning that sometimes happens in a conventional oven, ensuring that every clove is perfectly caramelized.

3. Retained Nutrients and Flavor

Air frying preserves more of the garlic’s natural antioxidants and nutrients compared to other cooking methods. Additionally, the quick cooking process ensures that garlic retains its rich, savory flavor, making it a great addition to any dish.

4. Less Oil

The air fryer requires less oil than other methods, so you can enjoy roasted garlic that’s lighter and healthier without sacrificing flavor.

What You’ll Need to Make Roasted Garlic Air Fryer

Before diving into the step-by-step process, it’s important to gather the ingredients and tools you’ll need. Roasting garlic in an air fryer is simple, but it helps to be prepared.

Ingredients:

  • Fresh Garlic Bulbs: Look for bulbs that are firm and free from blemishes. You’ll need two to three bulbs depending on how much garlic you want to roast.
  • Olive Oil: This will help the garlic roast evenly and bring out its natural sweetness.
  • Aluminum Foil or Parchment Paper: This is necessary to wrap the garlic and prevent it from drying out during roasting.

Tools:

  • Air Fryer: The star of the show. Any model will work, but make sure it has enough space for the garlic bulbs to fit comfortably.
  • Knife: For cutting off the tops of the garlic bulbs.
  • Tongs: Useful for handling the hot garlic once it’s roasted.
  • Small Bowl: For drizzling olive oil over the garlic.

Step-by-Step Instructions for Roasting Garlic in an Air Fryer

Now that you have everything you need, it’s time to walk through the process of roasting garlic in your air fryer. Trust us, it’s easier than you think.

1. Preparing the Garlic Bulbs

Start by preparing the garlic bulbs. Cut the top off each bulb of garlic with a sharp knife. You want to expose the individual cloves inside without fully peeling them. The cut should be just enough to reveal the tips of the garlic cloves, which will caramelize during the roasting process.

Once the garlic bulbs are prepared, drizzle olive oil over the exposed cloves. Use your fingers or a small brush to make sure the oil is evenly distributed. This step is essential for ensuring a nice, golden finish to your garlic.

2. Wrapping the Garlic in Aluminum Foil

Next, take a sheet of aluminum foil and wrap each garlic bulb tightly. This will help the garlic roast evenly and prevent it from drying out. If you prefer, you can use parchment paper as an alternative, but aluminum foil tends to give the garlic a more uniform roast.

3. Preheating the Air Fryer

Preheat your air fryer to 380°F (190°C). Most air fryers take just a few minutes to reach the desired temperature, so this part of the process is quick and efficient.

4. Roasting the Garlic

Once your air fryer is preheated, place the wrapped garlic bulbs inside the basket. Set the timer for 20-25 minutes. Depending on the size of the garlic bulbs and your air fryer model, you may need to adjust the cooking time slightly.

During this time, the garlic will soften, caramelize, and take on that amazing roasted aroma. Check for doneness by squeezing the bulb gently with tongs; if it feels soft and squishy, it’s ready to go.

5. Let the Garlic Cool and Unwrap

Once the garlic is roasted, remove it from the air fryer carefully using tongs. Let it cool for a few minutes. Once it’s cool enough to handle, unwrap the garlic and squeeze the cloves out of their skins. You should be left with soft, golden, and sweet garlic cloves ready to be used.

Tips and Tricks for Perfect Roasted Garlic Every Time

Want to make sure you’re getting the best roasted garlic possible? Here are some insider tips to ensure you roast garlic like a pro every time.

1. Don’t Overcook

Roasting garlic for too long can cause it to become bitter. While you want it to be soft and caramelized, be careful not to let it burn. Check it frequently after the 20-minute mark to make sure it doesn’t overcook.

2. Customize with Herbs

If you want to take your roasted garlic to the next level, try adding herbs like thyme, rosemary, or oregano to the garlic before roasting. The herbs will infuse the garlic with additional flavor, making it even more delicious.

3. Store Leftover Roasted Garlic

If you make extra roasted garlic, store it in an airtight container in the fridge. It can last up to a week and can be used in a variety of dishes. You can also freeze roasted garlic for up to three months.

4. Use Fresh Garlic

For the best results, always use fresh garlic bulbs. Older garlic may not roast as evenly and might have a stronger, less pleasant flavor.

What to Do with Roasted Garlic: Recipe Ideas and Uses

Now that you’ve mastered the art of roasting garlic in an air fryer, it’s time to start incorporating it into your meals. Here are some ideas on how to use your freshly roasted garlic:

1. Garlic Butter

One of the simplest and most delicious ways to use roasted garlic is by making garlic butter. Simply mash the roasted garlic and mix it with softened butter, a pinch of salt, and herbs like parsley or thyme. Spread it on fresh bread, use it to top grilled meats, or melt it over pasta.

2. Mashed Potatoes

For creamy, flavorful mashed potatoes, add a few cloves of roasted garlic. The roasted garlic air fryer will blend seamlessly into the potatoes, adding depth and richness without the harshness of raw garlic.

3. Pasta Sauces

roasted garlic air fryer can easily be incorporated into any pasta sauce, whether it’s marinara, alfredo, or pesto. Just mash the roasted cloves and stir them into the sauce for an extra layer of flavor.

4. Roasted Vegetables

Toss roasted garlic air fryer into your favorite roasted vegetable mix. Whether you’re cooking carrots, potatoes, or zucchini, the garlic will complement the natural sweetness of the vegetables and add complexity to the flavor.

5. Garlic Hummus

For a unique twist on traditional hummus, blend roasted garlic air fryer with chickpeas, tahini, lemon juice, and olive oil. It’s a perfect snack or appetizer that’s sure to impress.

Can You Roast Multiple Garlic Bulbs in the Air Fryer?

You might be wondering if it’s possible to roast more than one garlic bulb at a time in your air fryer. The good news is that, yes, you can! However, there are a few things to keep in mind.

  • Space Matters: Your air fryer has limited space, so make sure there’s enough room for each garlic bulb to cook evenly. If they’re crammed together, they might not roast properly.
  • Batch Cooking: If you’re making a large batch of roasted garlic, you may need to cook it in two or more rounds, especially if you’re using a smaller air fryer model.

roasted garlic air fryer FAQ

Q1: How long does it take to roast garlic in an air fryer?
A: On average, it takes about 20-25 minutes at 380°F. Check after 20 minutes to ensure it doesn’t overcook.

Q2: Can I use roasted garlic air fryer for garlic bread?
A: Yes, roasted garlic air fryer is perfect for garlic bread. Simply mash the cloves and mix them into softened butter, then spread it over the bread before baking.

Q3: How do I store leftover roasted garlic?
A: Store leftover roasted garlic air fryer in an airtight container in the fridge for up to a week. You can also freeze it for up to three months.

Conclusion: Unlock the Power of roasted garlic air fryer in Your Air Fryer

Roasting garlic in an air fryer is an easy and efficient way to enjoy this flavor-packed ingredient in your meals. Whether you’re making garlic butter, mashed potatoes, or simply adding it to pasta, roasted garlic air fryer enhances any dish with minimal effort. Plus, with the time-saving benefits of the air fryer, you’ll never go back to the old oven method.

Ready to bring roasted garlic air fryer into your kitchen? Try it out today and discover how this simple ingredient can transform your cooking!

Call to Action:
Now that you know how to roast garlic in an air fryer, it’s time to get cooking. Try out these tips and recipes, and let us know how you like to use your roasted garlic air fryer in the comments below!

How To Make A Perfect air fryer spaghetti squash

air fryer spaghetti squash

Introduction

Ever found yourself craving a cozy bowl of pasta but not the extra calories or carbs? Air fryer spaghetti squash might be the answer you’ve been searching for! Spaghetti squash is a vegetable that, when cooked, magically transforms into long, pasta-like strands. And thanks to the air fryer, making it is quicker and easier than ever. This guide will walk you through everything you need to know—from choosing the right squash to turning it into the perfect pasta substitute. By the end, you’ll be ready to whip up a satisfying, healthy dish in no time.

What is Spaghetti Squash and Why Use an Air Fryer?

Brief Overview of Spaghetti Squash

Spaghetti squash is a unique variety of squash that, when cooked, separates into thin strands resembling spaghetti. Its mild flavor makes it a versatile canvas for sauces, herbs, and toppings, making it perfect for low-carb, gluten-free meals that still feel indulgent. With only 42 calories per cup and packed with essential nutrients like fiber, vitamins, and antioxidants, it’s a powerhouse addition to any meal.

Benefits of Cooking Spaghetti Squash in an Air Fryer

An air fryer makes cooking spaghetti squash easier and faster than traditional methods. Here’s why it’s worth considering:

  • Time Efficiency: Air frying speeds up the cooking process, delivering tender strands in half the time compared to oven-baking.
  • Enhanced Flavor and Texture: Air frying allows for caramelization, creating a rich flavor and a tender, satisfying texture.
  • Convenience: Cooking in an air fryer minimizes cleanup, keeping everything contained and mess-free.

Ingredients Needed for Air Fryer Spaghetti Squash

Using just a handful of ingredients, you can bring out the natural flavor of spaghetti squash and add just the right touch of seasoning.

IngredientAmountNotes
Spaghetti Squash1 medium squashCut in half and deseeded
Olive Oil1-2 tbspFor brushing the squash
Salt & PepperTo tasteAdds basic seasoning
Optional HerbsTo tasteConsider thyme or garlic powder for extra flavor

Step-By-Step Guide to Making Air Fryer Spaghetti Squash

Cooking spaghetti squash in an air fryer requires a few simple steps that will make your meal prep feel effortless.

Step 1 – Preparing the Squash

  1. Cut the Squash in Half: With a sharp knife, carefully cut the squash lengthwise. If it’s tough to slice, try microwaving it for 2-3 minutes to soften it slightly.
  2. Scoop Out the Seeds: Use a spoon to remove seeds and stringy pulp from the center.
  3. Brush with Olive Oil: Lightly brush the inside of each half with olive oil, which helps to enhance the flavor and prevent drying.
  4. Season Generously: Add a sprinkle of salt, pepper, and any herbs of your choice to infuse subtle flavor into the squash as it cooks.

Step 2 – Air Frying the Spaghetti Squash

  1. Preheat the Air Fryer: Set your air fryer to 370°F (185°C) to ensure it’s hot enough for even cooking.
  2. Place the Squash in the Air Fryer Basket: Place each half cut-side up in the basket.
  3. Cook for 15-20 Minutes: Set a timer for 15-20 minutes, depending on the size of your squash. Check halfway through to ensure it’s cooking evenly.
  4. Check for Doneness: To test if it’s done, poke with a fork. The flesh should pull away easily in strands, resembling spaghetti.

Step 3 – Scraping the Spaghetti Squash Strands

  1. Cool Briefly: Allow the squash to cool for a few minutes after air frying.
  2. Scrape with a Fork: Use a fork to gently scrape the flesh, creating long, noodle-like strands.

How to Serve and Customize Your Air Fryer Spaghetti Squash

The beauty of spaghetti squash lies in its versatility. Here are some delicious ways to customize your dish:

  • Classic Marinara and Parmesan: Top your squash with marinara sauce, a sprinkle of Parmesan cheese, and fresh basil for an Italian-inspired, low-carb pasta replacement.
  • Healthy Meal Prep Bowl: Add roasted veggies, lean proteins like grilled chicken or shrimp, and a dollop of pesto for a satisfying meal.
  • Mediterranean Style: Combine with crumbled feta, olives, cherry tomatoes, and fresh herbs for a Mediterranean twist.
  • Spicy Kick: For those who love a bit of heat, add chili flakes or hot sauce along with a sprinkle of smoked paprika.

Tips for Perfect Air Fryer Spaghetti Squash

To ensure your squash turns out just right every time, keep these tips in mind:

  • Pick the Right Size: Smaller spaghetti squash fits better in most air fryer baskets. Aim for a medium-sized squash, around 2 pounds, to ensure it cooks evenly.
  • Adjust Seasonings: Don’t hesitate to experiment with different herbs and spices like garlic powder, Italian seasoning, or a pinch of nutmeg to add depth.
  • Avoid Overcrowding: If your air fryer basket is on the smaller side, cook each half separately. This ensures that each piece gets even airflow for thorough cooking.

Nutritional Information for Air Fryer Spaghetti Squash

Spaghetti squash is an excellent addition to a balanced diet. Here’s a breakdown of the nutritional content per one cup (cooked) of air-fried spaghetti squash:

NutrientAmount
Calories42
Carbohydrates10 grams
Fiber2 grams
Protein1 gram
Vitamin C9% of daily value
Vitamin B68% of daily value

Frequently Asked Questions (FAQs)

Is air fryer spaghetti squash low in carbs?
Absolutely. With only about 10 grams of carbs per cup, spaghetti squash is a popular choice for those following low-carb or keto diets.

Is it possible to cook spaghetti squash without slicing it in half?

Though it’s technically possible, cutting it in half ensures even cooking. Whole spaghetti squash may not cook evenly in an air fryer.

How do I know when the spaghetti squash is done?
You’ll know it’s ready when the flesh easily separates into strands with a fork. The strands should be tender but not mushy.

Can I store leftovers?
Yes, leftover spaghetti squash can be stored in an airtight container in the refrigerator for up to 3-4 days. When you’re ready to eat it, simply reheat in the air fryer or microwave.

What if my squash it’s too big for the air fryer?
If the squash doesn’t fit, cut it into quarters rather than halves. You can still follow the same cooking time, but check it for doneness.

Conclusion

Mastering air fryer spaghetti squash is a straightforward process that brings both flavor and convenience to your kitchen. By following these steps, you’ll create a dish that’s healthy, delicious, and ready in a fraction of the time it takes to bake. Plus, with endless topping options, you can adapt it to suit any craving. Whether you’re enjoying it with a classic marinara, a touch of Parmesan, or creating your own signature bowl, air fryer spaghetti squash is bound to become a household favorite.

Now it’s your turn to try it out! Grab a spaghetti squash, fire up the air fryer, and experiment with your favorite flavors and toppings. Don’t forget to share your delicious creations and spread the love for this amazing dish. Enjoy!