Air Fryer Chicken Tenderloins: Juicy, Crispy, & Easy Recipes

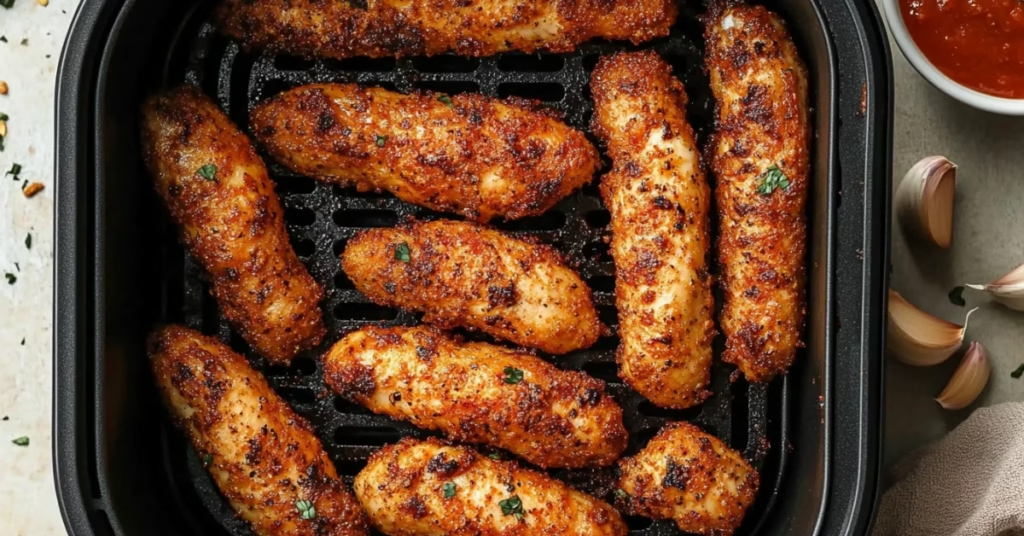
Seasoned air fryer chicken tenderloins served with a red dipping sauce, a perfect blend of crispy and juicy textures.

Chicken tenderloins are among the most versatile and easy-to-prepare cuts of chicken. With an air fryer, you can turn this tender, juicy meat into a crispy, flavorful dish without the need for excessive oil. This guide covers everything from basic preparation to advanced tips and variations, ensuring your tenderloins are always a hit.

What Are Chicken Tenderloins?

Chicken tenderloins are thin strips of meat located under the chicken breast. These pieces are prized for their tenderness, making them perfect for quick meals. Their mild flavor means they absorb marinades and seasonings well, offering endless possibilities for delicious recipes.

Nutritional Profile

  • High in protein: Approximately 20g per 3-ounce serving.
  • Low in fat: Only about 2g of fat per serving.
  • Rich in essential nutrients like niacin and vitamin B6.

Chicken tenderloins are a great choice for those following a high-protein, low-fat diet.

Why Use an Air Fryer for Chicken Tenderloins?

An air fryer is a modern kitchen appliance that circulates hot air to mimic the results of deep frying without the oil. For chicken tenderloins, the air fryer ensures:

  • A crispy exterior while keeping the interior juicy.
  • Faster cooking times compared to baking or pan-frying.
  • Minimal use of oil, making it a healthier option.

To learn more about maximizing your air fryer, check out this comprehensive guide to air frying.

Step-by-Step Recipe for Air Fryer Chicken Tenderloins

This recipe is simple and perfect for beginners. It yields tender, crispy chicken that pairs well with various sides.

Ingredients

Air Fryer Chicken Tenderloins

Recipe by Air Fryer repastsCourse: Main CourseCuisine: AmericanDifficulty: Easy
Servings

4

servings
Prep time

30

minutes
Cooking time

40

minutes
Calories

300

kcal
Total time

1

hour 

10

minutes

Ingredients

  • 1 pound chicken tenderloins

  • 1 tablespoon olive oil

  • 1 teaspoon salt

  • 0.5 teaspoon black pepper

  • 1 teaspoon garlic powder

  • 1 teaspoon smoked paprika

  • 0.5 teaspoon onion powder

Directions

  • Preheat the air fryer to 400 degrees Fahrenheit. This ensures an even cooking temperature throughout the process.
  • In a mixing bowl, combine the chicken tenderloins with olive oil, salt, black pepper, garlic powder, smoked paprika, and onion powder.
  • Place the seasoned tenderloins in the air fryer basket, making sure not to overcrowd them to allow for even cooking.
  • Cook the chicken tenderloins for 10-12 minutes, flipping them halfway through the cooking process for even browning.
  • Check that the internal temperature reaches 165 degrees Fahrenheit to ensure the chicken is safely cooked.
  • Once cooked, remove the chicken tenderloins from the air fryer and let them rest for 2 minutes before serving.
  • 1 lb chicken tenderloins
  • 1 tbsp olive oil or cooking spray
  • 1 tsp garlic powder
  • 1 tsp smoked paprika
  • ½ tsp salt
  • ½ tsp black pepper
  • Optional: ½ cup breadcrumbs for a crispy coating

Instructions

1. Preheat the Air Fryer

  • Set the air fryer to 375°F (190°C). Preheating ensures even cooking.

2. Prepare the Chicken

  • Pat the chicken tenderloins dry with a paper towel. This helps the seasonings adhere better.
  • In a large bowl, mix olive oil with garlic powder, smoked paprika, salt, and pepper. Add the chicken and toss to coat evenly.
  • For breaded tenderloins, dip the chicken in breadcrumbs after seasoning.

3. Cook the Tenderloins

  • Place the tenderloins in the air fryer basket in a single layer. Avoid overcrowding; cook in batches if necessary.
  • Air fry for 8-10 minutes, flipping halfway through. The internal temperature should reach 165°F (74°C).

4. Serve and Enjoy

  • Let the chicken rest for 2-3 minutes before serving. This ensures the juices are redistributed, keeping the meat tender.

Creative Variations

1. Breaded Tenderloins

For a classic crispy chicken experience:

  • Use panko breadcrumbs mixed with Parmesan cheese and Italian seasoning for extra flavor.
  • Spray the coated tenderloins with cooking spray before air frying to enhance crispiness.

2. Saucy Tenderloins

Toss your cooked chicken in your favorite sauces:

  • Honey Garlic: Mix honey, soy sauce, and minced garlic for a sweet and savory glaze.
  • Buffalo: Combine melted butter with hot sauce for a tangy kick.

3. Gluten-Free Options

  • Use almond flour or crushed rice crackers as a substitute for breadcrumbs.
  • Season with smoked paprika and chili powder for a bold flavor profile.

Advanced Tips for Perfect Air Fryer Chicken Tenderloins

1. Use a Meat Thermometer

Always check that the internal temperature reaches 165°F to ensure safety and juiciness.

2. Marinade for Flavor

Marinating your tenderloins for 30 minutes to 2 hours can elevate their taste. Try a simple mix of olive oil, lemon juice, and garlic.

3. Avoid Overcrowding

Air circulation is key in an air fryer. Overcrowding the basket leads to uneven cooking and less crispiness.

Side Dishes That Complement Chicken Tenderloins

1. Vegetables

  • Air-Fried Asparagus: A quick and nutritious option, seasoned with garlic and Parmesan. Learn more about this pairing in air fryer asparagus recipes.
  • Roasted Brussels Sprouts: Toss with olive oil, salt, and pepper for a crispy, caramelized finish.

2. Potatoes

3. Grains

  • Quinoa: Add a light drizzle of olive oil and a squeeze of lemon for a fresh, vibrant pairing.
  • Wild Rice: Its nutty flavor complements the tender chicken.

FAQs About Air Fryer Chicken Tenderloins

1. Can I Cook Frozen Tenderloins in the Air Fryer?

Yes! Add 2-3 minutes to the cooking time and ensure the chicken reaches an internal temperature of 165°F.

2. How Can I Make Them Crispier?

  • Pat the chicken dry before seasoning.
  • Use a light coat of oil spray on the tenderloins before cooking.

3. Can I Use Marinades?

Absolutely! Marinades enhance the flavor but pat the chicken dry before air frying to avoid sogginess.

Health Benefits of Air Fryer Chicken Tenderloins

Air frying is a game-changer for health-conscious cooks:

  • Lower in Fat: Requires only a small amount of oil compared to traditional frying.
  • Calorie-Friendly: A typical serving contains around 150-200 calories, depending on preparation.
  • Nutrient Retention: The quick cooking process helps retain more nutrients.

Storage and Reheating Tips

  • Storage: Place leftover tenderloins in an airtight container and refrigerate for up to 3 days.
  • Reheating: Reheat in the air fryer at 350°F (175°C) for 3-4 minutes to restore crispiness.

Conclusion

Cooking chicken tenderloins in an air fryer is a fast, healthy, and delicious way to enjoy this versatile cut of meat. Whether you prefer them breaded, saucy, or simply seasoned, the air fryer ensures perfect results every time. Pair them with creative sides like air-fried asparagus or crispy potato wedges for a complete meal.

For more inspiration, try experimenting with other air fryer recipes like crispy okra or air fryer grilled cheese.

Happy cooking, and enjoy your delicious air fryer chicken tenderloins!

Got a Minute? Leave Us a Review!

5.0
5.0 out of 5 stars (based on 1 review)
Excellent100%
Very good0%
Average0%
Poor0%
Terrible0%

Others Reviews

Yemmy Recipe

December 26, 2024

it’s A Good Recipe To Make Special on Dinner,

Please Can You Make *air fryer frozen french fries*

And Super Thanks From Adrian
Adrian


Did You Like Our Recipe ? Share it With Your Friends And Enjoy With them

Air Fryer Crab Rangoon: Quick And Easy

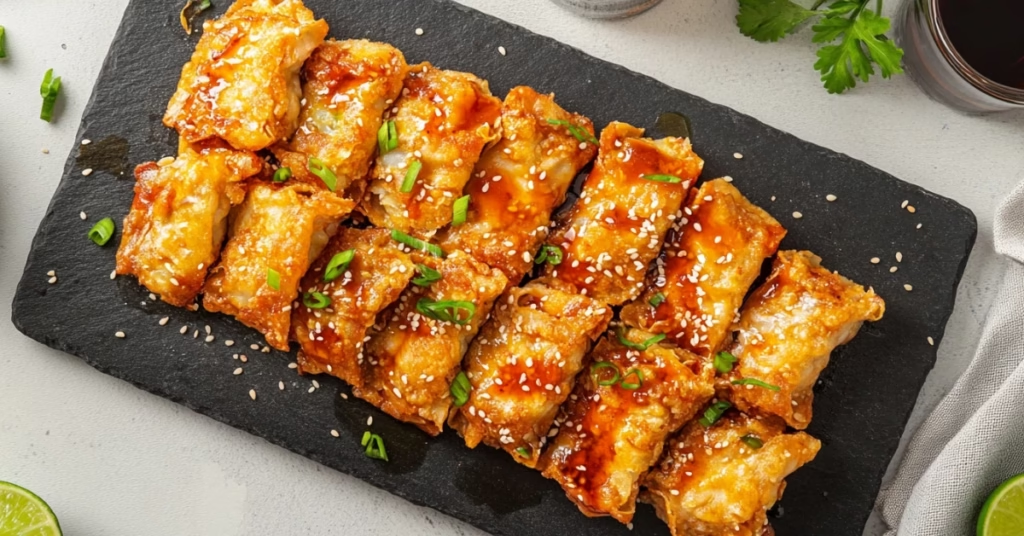
Golden air fryer Crab Rangoon on a black serving plate with a side of dipping sauce.

Air fryer cooking has revolutionized the way we enjoy fried food, and Crab Rangoon is no exception. This delightful appetizer, with its creamy crab filling and crispy wonton shell, is a favorite at many Chinese-American restaurants. However, traditional deep frying can be heavy on calories and mess. In this guide, we’ll explore how to make air fryer Crab Rangoon, covering everything from ingredients to storage, health benefits, and creative twists.

Looking for more versatile air fryer recipes? Try crispy air fryer okra or air fryer potato wedges for delicious sides to pair with your Crab Rangoon.

What is Crab Rangoon?

Crab Rangoon is a fried wonton filled with a creamy mixture of crab, cream cheese, and seasonings. It’s a Chinese-American creation, designed to cater to Western palates. While deep frying gives it a golden crunch, it also adds unnecessary oil and calories. Air frying provides a healthier alternative without compromising on texture or flavor.

Why Use an Air Fryer for Crab Rangoon?

The air fryer is a game-changer for preparing Crab Rangoon. Instead of submerging the wontons in oil, the air fryer circulates hot air to crisp them up. This method slashes fat content while maintaining the crunch we all love.

Looking for more snack ideas? Consider trying air fryer taquitos or fried ravioli in an air fryer, which offer equally crispy, flavorful bites.

Benefits of Air Frying:

  • Healthier Cooking: Up to 75% less fat compared to traditional frying.
  • Ease of Use: No need to monitor hot oil, reducing risks of burns or spills.
  • Quick Cleanup: No greasy residue to scrub off.

Ingredients for Air Fryer Crab Rangoon

Best Air Fryer Crab Rangoon

Recipe by air fryer repastsCourse: AppetizerCuisine: Chinese-AmericanDifficulty: Easy
Servings

6

servings
Prep time

15

minutes
Cooking time

10

minutes
Calories

250

kcal

Air fryer cooking has revolutionized the way we enjoy fried food, and Crab Rangoon is no exception.

Ingredients

  • 8 oz cream cheese

  • 1 cup crab meat

  • 2 tbsp green onions

  • 1 tsp Worcestershire sauce

  • 1 tsp soy sauce

  • 1 clove garlic, minced

  • 24 wonton wrappers

  • 1 egg, beaten

Directions

  • In a mixing bowl, combine the cream cheese, crab meat, chopped green onions, Worcestershire sauce, soy sauce, and minced garlic. Mix until all ingredients are well combined.
  • Lay the wonton wrappers on a clean surface. Place about one tablespoon of the crab mixture in the center of each wrapper.
  • Brush the edges of the wonton wrappers with beaten egg to help seal them. Fold the corners towards the center and press edges to seal firmly.
  • Preheat the air fryer to 375°F. Lightly spray the crab rangoons with cooking oil to achieve a crispy texture.
  • Arrange the crab rangoons in a single layer inside the air fryer basket. Cook for about 8 to 10 minutes, or until they are golden brown and crispy.
  • Remove the crab rangoons from the air fryer and allow them to cool slightly before serving as they will be very hot inside.

To make perfect Crab Rangoon at home, you’ll need the following ingredients:

For the Filling:

  • Crab Meat: Fresh lump crab is the best, but canned or imitation works too.
  • Cream Cheese: Full-fat for richness or light cream cheese for a healthier twist.
  • Green Onions: Adds a mild, fresh bite.
  • Soy Sauce: A hint of saltiness to balance the creaminess.
  • Garlic Powder and Ginger: Enhances the savory profile.

For the Wrappers:

  • Wonton wrappers: Available pre-made at most grocery stores.
  • Water: For sealing the wrappers.

For Cooking:

  • Oil spray: A light mist ensures a golden brown exterior.

Step-by-Step Recipe for Air Fryer Crab Rangoon

1. Prepare the Filling

  1. Combine cream cheese, soy sauce, green onions, garlic powder, and ginger in a bowl.
  2. Fold in the crab meat gently to avoid breaking it into fine pieces.

2. Assemble the Wontons

  • Lay out wonton wrappers on a clean surface.
  • Add a teaspoon of filling to the center of each wrapper.
  • Wet the edges with water and fold into a triangle or pyramid, pressing firmly to seal.

3. Cook in the Air Fryer

  1. Preheat the air fryer to 370°F (190°C).
  2. Arrange the wontons in a single layer, ensuring they don’t touch.
  3. Spray lightly with oil and cook for 9–10 minutes until golden brown.

Creative Variations of Crab Rangoon

1. Vegetarian Rangoon

Replace crab with finely chopped spinach, mushrooms, or a blend of both.

2. Spicy Crab Rangoon

Add diced jalapeños or a splash of sriracha to the filling for a spicy kick.

3. Sweet Crab Rangoon

Mix in a touch of sweet chili sauce or honey for a sweet-and-savory balance.

For a dessert pairing, consider air fryer churros to round out your menu.

Health Benefits of Air Fryer Crab Rangoon

Switching from deep frying to air frying significantly reduces the calorie and fat content of Crab Rangoon. Here’s why this method is healthier:

  1. Reduced Fat Content: Traditional frying soaks food in oil, while air frying uses only a light mist.
  2. Fewer Calories: Eliminating oil reduces the overall calorie count without sacrificing flavor.
  3. Preserves Nutrients: The quick cooking time retains the nutrients in the fresh ingredients, such as green onions.

Perfect Pairings for Crab Rangoon

Enhance your Crab Rangoon experience by pairing it with complementary dishes and sauces.

Dipping Sauces:

  • Soy Sauce-Based Dip: Combine soy sauce, rice vinegar, and a touch of sesame oil.
  • Spicy Chili Sauce: A mixture of honey, sriracha, and lime juice.
  • Peanut Sauce: Creamy and nutty, ideal for those who love bold flavors.

Side Dishes:

  • Air fryer asparagus: A healthy, crunchy veggie to balance the richness of the Rangoon.
  • Air fryer potato wedges: Perfectly seasoned, crispy potatoes for a heartier side.
  • Asian Slaw: A fresh, tangy side that complements the creamy filling.

Storage and Reheating Tips

Refrigeration:

Store cooked Crab Rangoon in an airtight container in the refrigerator for up to 3 days.

Freezing:

Freeze uncooked wontons on a baking sheet before transferring to a freezer bag. They can be cooked directly from frozen.

Reheating:

Use the air fryer to reheat at 370°F for 2–3 minutes to restore crispiness.

FAQs About Air Fryer Crab Rangoon

Can I Use Imitation Crab Meat?

Yes, imitation crab is a cost-effective alternative that still provides a satisfying flavor.

How Do I Prevent Wonton Wrappers from Drying Out?

Keep unused wrappers covered with a damp cloth while assembling.

Can I Make Crab Rangoon Ahead of Time?

Absolutely! Prepare and freeze the wontons in advance, then cook them as needed.

Conclusion

Air fryer Crab Rangoon is the perfect appetizer for those who want a healthier, yet equally delicious, alternative to traditional deep-fried wontons. Pair it with sides like air fryer asparagus or crispy okra, and enjoy a restaurant-quality dish at home.

So, grab your air fryer and give this recipe a try. Your taste buds—and your health—will thank you!

Got a Minute? Leave Us a Review!

0.0
0.0 out of 5 stars (based on 0 reviews)
Excellent0%
Very good0%
Average0%
Poor0%
Terrible0%

Others Reviews

There are no reviews yet. Be the first one to write one.


Did You Like Our Recipe ? Share it With Your Friends And Enjoy With them

How To Make Air Fryer Brats: Easy and Quick

Air fryer brats served with grilled bell peppers, parsley, and pretzel buns.

Introduction: Why Air Fry Brats?

Bratwurst, fondly known as brats, are a beloved culinary delight cherished for their savory flavors and hearty textures. Traditionally grilled or boiled, these sausages have found a new champion in the modern kitchen appliance—the air fryer. This cooking method combines speed, efficiency, and crisp perfection to create a mouthwatering dish with minimal effort.

Switching to an air fryer has numerous advantages. Not only does it save time, but it also allows you to experiment with other exciting dishes. For example, pairing brats with crispy air fryer okra or creating a side of perfectly seasoned potato wedges can elevate your meal to restaurant-level quality.

What Are Brats?

Before diving into the recipe, let’s take a closer look at brats:

  • Origins:
    • Bratwurst is a German sausage traditionally made from pork, beef, or veal.
    • Its unique blend of spices and herbs creates a distinctive flavor.
  • Varieties:
    • Fresh Brats: These are raw and require thorough cooking.
    • Pre-Cooked Brats: Partially cooked for convenience.
    • Flavored Brats: Options include beer-infused, spicy, or cheesy varieties.
  • Why Choose Brats?
    • Packed with protein and bold flavors, brats make for a satisfying meal.
    • They are versatile, pairing well with classic sides or innovative accompaniments.

The Benefits of Cooking Brats in an Air Fryer

The air fryer is a game-changer for cooking brats. Here’s why:

  • Healthier Cooking:
    • Uses little to no oil, reducing unnecessary fats while retaining flavor.
    • Avoids the carcinogens often associated with grilling.
  • Faster Results:
    • Preheats quickly and cooks within minutes, making it ideal for busy schedules.
  • Crispy Exterior, Juicy Interior:
    • The circulating hot air ensures even cooking, resulting in perfectly crisp exteriors and juicy insides.
  • Minimal Cleanup:
    • Forget the grease splatter! Air fryers are easy to clean, saving time and effort.

Looking for more quick air fryer recipes? Try air fryer asparagus or experiment with other vegetables to pair with your brats.

How to Prepare Brats for Air Frying

Preparation is key to achieving the perfect balance of crispness and flavor. Follow these steps:

1. Choosing Your Brats

  • Opt for fresh, high-quality brats for the richest flavor.
  • If you’re short on time, pre-cooked brats are a great alternative.
  • Specialty options like beer-infused or jalapeño brats can add a unique twist to your dish.

2. Thawing and Seasoning

  • Thaw Frozen Brats: Defrost them overnight in the refrigerator or use cold water for faster results.
  • Light Seasoning: While brats are flavorful on their own, brushing them with a light coat of oil or adding your favorite spices can enhance their taste.

3. Preheat the Air Fryer

  • Set the air fryer to 375°F (190°C) for optimal results.
  • Preheating ensures even cooking and a crispy casing.

Step-by-Step Cooking Guide for Air Fryer Brats

The Best Air Fryer Brats Recipe

Recipe by Air Fryer repastsCourse: Main CourseCuisine: German, AmericanDifficulty: Easy
Servings

4

servings
Prep time

5

minutes
Cooking time

15

minutes
Calories

280

kcal

Ingredients

  • 4 pieces bratwurst sausages

  • 1 cup sliced onions

  • 1 cup bell peppers

Directions

  • Preheat your air fryer to 370 degrees Fahrenheit for about 5 minutes to ensure even cooking of the sausages.
  • Place bratwurst sausages in a single layer in the basket, ensuring that they do not overlap for optimal air frying.
  • Cook the brats in the air fryer for 7-8 minutes. Check them halfway through to turn and ensure even browning.
  • Add sliced onions and bell peppers to the basket. Continue cooking for another 7 minutes until veggies are tender.
  • Use a meat thermometer to check that the internal sausage temperature reaches at least 160 degrees Fahrenheit.
  • Once cooked, remove brats and veggies from the air fryer. Serve together on a plate or within a bun.

Cooking brats in an air fryer is straightforward. Here’s a foolproof guide:

1. Prepare the Brats

  • Arrange the brats in the air fryer basket in a single layer, ensuring they don’t overlap.

2. Cooking Time

  • Fresh Brats: Cook for 12–15 minutes, flipping halfway through.
  • Pre-Cooked Brats: Cook for 8–10 minutes.
  • Check the internal temperature with a meat thermometer—it should reach 160°F (71°C).

3. Optional Additions

  • Add sliced onions, bell peppers, or mushrooms to the air fryer basket during the last 5 minutes for a one-basket meal.

4. Rest Before Serving

  • Allow the brats to rest for 2–3 minutes after cooking to let the juices settle.

Serving Suggestions for Air Fryer Brats

Traditional Pairings

  • Classic Sides:
    • Sauerkraut or coleslaw adds a tangy complement.
    • Potato salads or baked beans for a hearty meal.
  • Condiments:
    • Serve with mustard, ketchup, or horseradish for added flavor.

Modern Twists

  • Low-Carb Options:
    • Serve brats on a bed of lettuce or alongside a zucchini noodle salad.
  • Creative Toppings:
    • Experiment with avocado slices, spicy mayo, or caramelized onions.

Pair with Perfect Sides

Combine your brats with crispy fingerling potatoes or even a side of air fryer grilled cheese for an indulgent, well-rounded meal.

Creative Air Fryer Brat Recipes

1. Beer-Braised Brats

  • Marinate the brats in beer for an hour before cooking.
  • The beer infuses the sausages with a rich, malty flavor.

2. Cheesy Jalapeño Brats

  • Slice the brats lengthwise and stuff them with cheddar cheese and diced jalapeños before air frying.

3. Cajun-Spiced Brats

  • Rub the brats with a mix of Cajun spices for a smoky, spicy twist.
  • Serve with cornbread or rice.

Tips for Perfect Air Fryer Brats

1. Use a Meat Thermometer

  • Always confirm an internal temperature of 160°F for safety and optimal texture.

2. Don’t Overcrowd the Basket

  • Leave space between each brat to allow hot air to circulate evenly.

3. Experiment with Recipes

  • Switch up flavors by adding unique toppings or pairing brats with unconventional sides like air fryer churros for a sweet contrast.

4. Clean Your Air Fryer Regularly

  • Prevent grease buildup by cleaning the basket and tray after each use.

FAQs About Air Fryer Brats

1. Can You Cook Frozen Brats in an Air Fryer?

Yes! Simply increase the cooking time by 5–7 minutes. Ensure the internal temperature still reaches 160°F.

2. Do You Need to Boil Brats Before Air Frying?

No. The air fryer thoroughly cooks the brats while crisping the casing, eliminating the need for boiling.

3. Can You Cook Vegetables with Brats?

Absolutely! Toss in sliced onions, peppers, or even mushrooms for a complete, flavorful meal.

Conclusion

Cooking air fryer brats is an easy, healthy, and versatile way to enjoy this classic sausage. Whether you’re serving them at a summer barbecue or preparing a quick family dinner, the air fryer guarantees consistent, delicious results.

For more air fryer inspiration, explore recipes like air fryer churros for dessert or try air fryer asparagus to round out your meal.

Enjoy the perfect blend of crispy exteriors and juicy interiors with every bite. Ready to fire up your air fryer? Let the cooking adventure begin!

Got a Minute? Leave Us a Review!

0.0
0.0 out of 5 stars (based on 0 reviews)
Excellent0%
Very good0%
Average0%
Poor0%
Terrible0%

Others Reviews

There are no reviews yet. Be the first one to write one.


Did You Like Our Recipe ? Share it With Your Friends And Enjoy With them

The Best Air Fryer Okra: Crunchy and Savory

Square, close-up shot of crispy, breaded air Fryer okra slices served on a white plate with a bowl of creamy dill dipping sauce. The okra is golden-brown, evenly coated, and garnished with herbs.

Okra is a versatile and nutrient-rich vegetable that has been a staple in Southern cuisine for decades. Traditionally fried in oil for a crispy texture, okra is now experiencing a modern twist with the advent of air fryers. With less oil and fewer calories, air fryer okra retains all the crunch and flavor of the classic dish while being healthier and easier to prepare. This guide will walk you through the steps to make the perfect air fryer okra, explore its health benefits, and provide serving tips, storage instructions, and flavorful variations.

Why Choose Air Fryer Okra?

Okra is a popular vegetable known for its distinctive taste and numerous health benefits. While deep-frying is the traditional method of preparing okra, air frying offers a healthier alternative. Air fryers use hot air circulation to create a crispy exterior without the need for excessive oil, making them a favorite for health-conscious cooks.

For a detailed look at other air-fried vegetable recipes, try the Air Fryer Asparagus Recipe, which highlights how air frying enhances the natural flavors of vegetables while maintaining a crispy texture.

Health Benefits of Okra

Okra isn’t just delicious; it’s also a nutritional powerhouse. Here’s why you should include it in your diet:

  • High in Fiber: Promotes healthy digestion and helps regulate blood sugar levels.
  • Rich in Antioxidants: Contains vitamins C and K, which are vital for immune function and bone health.
  • Low in Calories: Makes it a great option for those on a calorie-controlled diet.
  • Packed with Minerals: Offers magnesium, calcium, and potassium to support overall health.

Combining these benefits with the low-fat cooking method of an air fryer makes this recipe an excellent choice for a balanced diet. For another healthy snack idea, check out Air Fryer Taquitos for a crispy treat with a flavorful twist.

Ingredients You’ll Need

Air Fryer Okra

Recipe by [email protected]Course: Snack, Side DishCuisine: Southern, AmericanDifficulty: Easy
Servings

4

servings
Prep time

10

minutes
Cooking time

20

minutes
Calories

150

kcal

Ingredients

  • 1 pound okra

  • 2 tablespoons olive oil

  • 0.5 teaspoon salt

  • 0.5 teaspoon black pepper

  • 1 teaspoon garlic powder

Directions

  • Wash the okra thoroughly under running water and pat dry with a clean towel. Make sure it is completely dry before proceeding.
  • Trim the stems off the okra and cut each piece into bite-sized chunks. Be sure all pieces are of similar size for even cooking.
  • In a large mixing bowl, combine the okra pieces with olive oil, salt, black pepper, and garlic powder. Toss until all pieces are evenly coated.
  • Preheat the air fryer to 400°F (200°C). Arrange the okra in a single layer in the air fryer basket, being careful not to overcrowd.
  • Cook the okra for 15-20 minutes, shaking the basket halfway through to ensure even cooking. Check that the okra is crispy and golden before stopping.
  • Remove the okra from the air fryer and transfer it to a serving dish. Enjoy it while warm as a tasty, crispy snack or side.

Making air fryer okra is simple and requires only a few key ingredients:

  • Okra: Use fresh or frozen, trimmed, and cut into ½-inch slices.
  • Cornmeal and Flour: For the breading.
  • Spices: Paprika, garlic powder, onion powder, cayenne pepper (optional), and salt.
  • Egg Wash: Beat one egg with a splash of water to help the breading adhere.
  • Cooking Spray: For achieving a golden, crispy exterior.

How to Make Air Fryer Okra

Follow these step-by-step instructions to create perfectly crispy okra:

Step 1: Prepare the Okra

  • If using fresh okra, wash thoroughly, pat dry, and cut into uniform slices.
  • For frozen okra, allow it to thaw slightly and dry it with a paper towel to remove excess moisture.

Step 2: Create the Breading

  • In a mixing bowl, combine equal parts cornmeal and flour. Add paprika, garlic powder, cayenne, and a pinch of salt.
  • In another bowl, beat an egg with a tablespoon of water.

Step 3: Bread the Okra

  • Dip each slice of okra into the egg wash, ensuring it is fully coated.
  • Roll the okra in the breading mixture, pressing gently to ensure the coating sticks.

Step 4: Air Fry

  • Preheat your air fryer to 375°F (190°C).
  • Arrange the breaded okra in a single layer in the air fryer basket. Avoid overcrowding for even cooking.
  • Lightly spray with cooking oil and air fry for 12–15 minutes, shaking the basket halfway through for uniform crispiness.

Flavor Variations to Try

While the classic recipe is a hit, there are plenty of ways to customize your air fryer okra:

1. Spicy Cajun Okra

  • Add Cajun seasoning and a dash of cayenne pepper to the breading mix for a spicy kick.

2. Garlic Parmesan Okra

  • After air frying, toss the okra in grated Parmesan and garlic powder for a savory twist.

3. Vegan Option

  • Substitute the egg wash with a mixture of almond milk and ground flaxseed.

4. Gluten-Free Version

  • Use almond flour or gluten-free breadcrumbs instead of traditional flour.

For more unique air fryer recipes, try Corn Ribs in the Air Fryer, a creative take on a classic vegetable.

How to Serve Air Fryer Okra

Air fryer okra is versatile and pairs well with a variety of dishes. Here are some serving ideas:

  • As a Snack: Serve with dipping sauces like ranch, barbecue, or spicy mayo.
  • As a Side Dish: Pair with mains such as Air Fryer Meatloaf for a complete meal.
  • In Salads or Wraps: Add a crunchy element to green salads or wraps for extra texture and flavor.

Storing and Reheating Instructions

  • Storing: Place leftover okra in an airtight container and refrigerate for up to two days.
  • Reheating: Reheat in the air fryer at 350°F for 3–4 minutes to restore crispiness. Avoid using a microwave, as it may make the okra soggy.

Common Questions About Air Fryer Okra

Can I use frozen okra in an air fryer?

Yes! Frozen okra works well in an air fryer. Be sure to thaw and dry it to prevent sogginess.

How do I make my okra extra crispy?

Preheat your air fryer, avoid overcrowding the basket, and use a light spray of oil for maximum crispiness.

What other spices can I use for seasoning?

Paprika, garlic powder, onion powder, smoked paprika, and cayenne are excellent options for enhancing flavor.

Bonus Tips for Perfecting Air Fryer Okra

  • Preheat Your Air Fryer: Ensures even cooking and a crisp exterior.
  • Shake the Basket: Toss the okra halfway through cooking for uniform browning.
  • Experiment with Coatings: Try crushed nuts or panko breadcrumbs for added texture.

Conclusion: Healthy and Delicious

Air fryer okra combines the best of both worlds: the delicious crunch of fried okra and the health benefits of air frying. Whether you’re preparing it as a snack, side dish, or salad topping, this dish is sure to impress. With endless flavor variations and serving options, it’s a recipe you’ll return to time and time again.

For more air fryer inspiration, explore the Air Fryer Potato Wedges and discover how versatile your air fryer can be!

Got a Minute? Leave Us a Review!

5.0
5.0 out of 5 stars (based on 1 review)
Excellent100%
Very good0%
Average0%
Poor0%
Terrible0%

Others Reviews

Nice Recipe

December 21, 2024

I Wold Like To Say Thank You So Much.. To Air fryer repasts

Angela


Did You Like Our Recipe ? Share it With Your Friends And Enjoy With them

Air Fryer Asparagus: Healthy and Tasty

air fryer asparagus

Air fryer asparagus is a game-changer for anyone who loves healthy, quick, and delicious side dishes. This cooking method delivers crispy-tender asparagus spears in just minutes, using less oil than traditional frying. In this guide, you’ll discover the benefits of air frying asparagus, step-by-step instructions, seasoning variations, and tips to achieve the perfect texture every time.

Cooking asparagus in an air fryer offers numerous advantages that make it a preferred method for many home cooks:

  • Healthier Option: Air frying requires minimal oil, making it a lower-calorie and lower-fat option compared to deep frying. For more healthy air fryer recipes, try these perfectly seasoned air fryer potato wedges.
  • Quick and Convenient: Asparagus cooks in just 8-10 minutes in an air fryer, saving time compared to roasting or steaming.
  • Perfect Texture: The circulating hot air gives asparagus a crispy exterior while keeping the inside tender and flavorful.

Pair your asparagus with protein-rich dishes like this juicy air fryer meatloaf for a balanced and satisfying meal.

Health Benefits of Asparagus

Asparagus is a nutritional powerhouse. Here’s a look at the key health benefits of incorporating this vegetable into your diet:

  • Rich in Nutrients: Asparagus is packed with vitamins A, C, E, and K, as well as folate, which supports cell function and growth.
  • High in Fiber: The dietary fiber in asparagus promotes digestive health and helps regulate blood sugar.
  • Loaded with Antioxidants: It contains antioxidants like glutathione and quercetin, which help protect your cells from damage.
  • Low in Calories: One cup of asparagus has just 27 calories, making it an excellent option for weight management.

Air frying preserves more nutrients than boiling or steaming, making it one of the healthiest ways to prepare asparagus.

Choosing the Best Asparagus for Air Frying

Selecting the right asparagus is crucial for achieving the best results. Here’s what to look for:

Types of Asparagus

  • Green Asparagus: The most common variety, known for its vibrant color and earthy flavor.
  • White Asparagus: Grown without sunlight, this variety has a milder flavor and a more delicate texture.
  • Purple Asparagus: Slightly sweeter than green asparagus, with a higher antioxidant content.

Tips for Choosing Fresh Asparagus

  • Look for firm, straight spears with tightly closed tips.
  • The stalks should be a vibrant green or purple, depending on the variety.
  • Avoid asparagus with wrinkled stems or slimy tips.

Thickness Matters

  • Thin Spears: Cook quickly and are great for crisp-tender results.
  • Thick Spears: Require a slightly longer cooking time but are meatier and more substantial.

How to Prepare Asparagus for the Air Fryer

Proper preparation ensures your asparagus turns out perfectly every time. Follow these steps:

  1. Wash the Asparagus
    • Rinse the spears under cold water to remove any dirt or grit.
  2. Trim the Ends
    • Snap off the woody ends by gently bending each spear until it breaks naturally. Alternatively, cut off about 1-2 inches from the bottom.
  3. Dry Thoroughly
    • Pat the asparagus dry with a kitchen towel or paper towels. Excess moisture can prevent crisping.
  4. Seasoning
    • Drizzle with olive oil and season with salt, pepper, and your preferred spices.

Step-by-Step Guide to Air Frying Asparagus

Ingredients

Air Fryer Asparagus

Recipe by air fryer repastsCourse: Side DishCuisine: AmericanDifficulty: Easy
Servings

4

servings
Prep time

5

minutes
Cooking time

10

minutes
Calories

60

kcal

Ingredients

  • 1 pound asparagus

  • 1 tablespoon olive oil

  • 0.5 teaspoon salt

  • 0.25 teaspoon black pepper

  • 0.5 teaspoon garlic powder

Directions

  • Wash and trim the woody ends of the asparagus stalks. It’s important to ensure the asparagus is appropriately prepared before cooking.
  • In a large bowl, toss the asparagus with olive oil, salt, black pepper, and garlic powder until evenly coated.
  • Preheat the air fryer to 400°F (200°C) for about 3 minutes. This ensures the asparagus will cook evenly and develop a nice crisp.
  • Place the seasoned asparagus in the air fryer basket, arranging them in a single layer for even cooking results.
  • Cook the asparagus in the air fryer for 7-10 minutes, shaking the basket halfway through to ensure they cook evenly.
  • Check for desired tenderness. If needed, cook for an additional 2 minutes. Serve immediately as a delicious side dish.

Another Instructions

  1. Preheat the Air Fryer
    • Set your air fryer to 400°F (200°C). Preheating helps cook the asparagus evenly.
  2. Season the Asparagus
    • Place the washed and trimmed asparagus in a bowl. Drizzle with olive oil and sprinkle with salt, pepper, and any additional seasonings. Toss to coat evenly.
  3. Arrange in the Basket
    • Place the asparagus in a single layer in the air fryer basket. Avoid overcrowding to ensure even cooking.
  4. Air Fry
    • Cook for 8-10 minutes, shaking the basket halfway through. Thin spears may need only 6-7 minutes, while thicker ones may need up to 12 minutes.
  5. Serve Immediately
    • Transfer the asparagus to a plate and serve hot.

Delicious Seasoning Variations

1. Garlic Parmesan Asparagus

  • Sprinkle with garlic powder before cooking and finish with grated Parmesan and a squeeze of lemon juice.

2. Lemon Butter Asparagus

  • Drizzle with melted butter and top with lemon zest and fresh parsley after air frying.

3. Spicy Cajun Asparagus

  • Season with a mix of paprika, cayenne pepper, and garlic powder for a bold, spicy kick.

Serving Suggestions

Air fryer asparagus pairs beautifully with a variety of main dishes. Here are a few ideas:

  • Grilled Steak: The crisp-tender texture of asparagus complements a juicy steak.
  • Chicken Dishes: Serve alongside crispy air fryer chicken drumsticks for a balanced meal.
  • Fish: Asparagus and fish are a classic combination. Try it with air-fried salmon or tilapia.
  • Pasta and Grain Bowls: Add air-fried asparagus to pasta, quinoa, or rice bowls for extra nutrients.

Common Mistakes and How to Avoid Them

  1. Overcooking: Asparagus can become mushy if overcooked. Start with 8 minutes and adjust as needed.
  2. Skipping Preheating: Always preheat your air fryer for even cooking.
  3. Crowding the Basket: Cook in batches if needed to avoid steaming the asparagus.

FAQs About Air Fryer Asparagus

How Long Should I Cook Asparagus in the Air Fryer?

Cook for 8-10 minutes at 400°F (200°C).

Can I Cook Frozen Asparagus in the Air Fryer?

Yes! Add an extra 2-3 minutes to the cooking time.

How Do I Reheat Air Fryer Asparagus?

Reheat at 350°F (175°C) for 3-4 minutes to maintain crispiness.

Conclusion

Air fryer asparagus is a versatile, healthy, and delicious side dish that’s perfect for any meal. With just a few simple steps and endless seasoning possibilities, you can enjoy crispy-tender asparagus anytime. Pair it with your favorite proteins or pasta dishes, and explore other quick air fryer recipes like these crispy fingerling potatoes for a complete meal.

Happy cooking! 🥦✨

Air Fryer Meatloaf: Juicy and Delicious

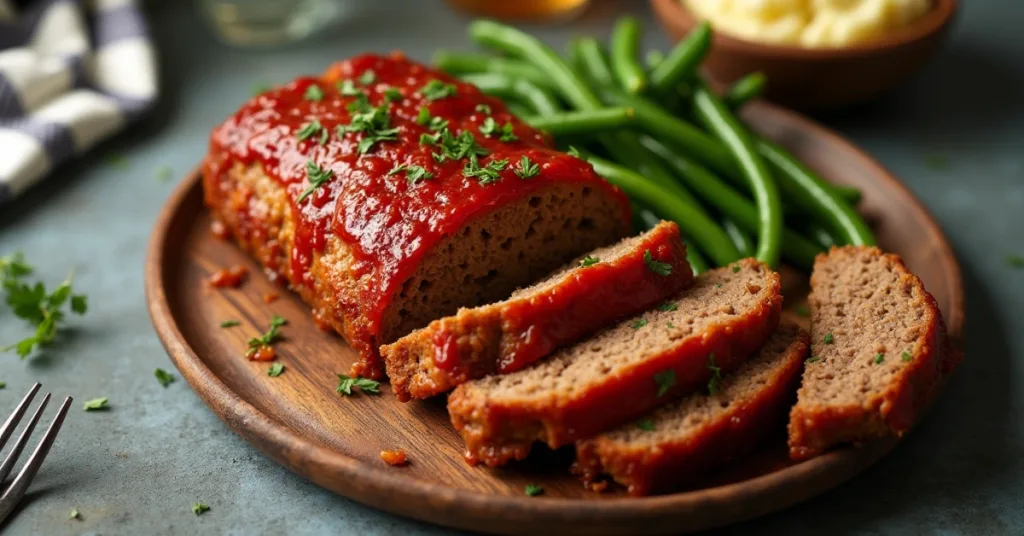
Air Fryer Meatloaf

Air fryer meatloaf is a modern take on a classic comfort food. This recipe offers a crispy crust, a juicy interior, and takes a fraction of the time compared to traditional oven-baking. Using an air fryer not only speeds up the cooking process but also makes it healthier by using less oil. Whether you’re new to air fryers or a seasoned pro, this guide will walk you through everything you need to know about making the perfect air fryer meatloaf.

Let’s dive into the ingredients, step-by-step instructions, tips, and serving ideas to make your meatloaf a guaranteed hit!

Why Use an Air Fryer for Meatloaf?

An air fryer is an excellent tool for making meatloaf due to the following advantages:

  • Faster Cooking Time: Air fryers reduce cooking time by up to 30% compared to traditional ovens.
  • Perfect Texture: The circulating hot air creates a crispy exterior while keeping the inside juicy and tender.
  • Healthier Choice: Air frying uses minimal or no oil, offering a healthier option compared to traditional frying or baking methods.

For more ideas on how to achieve that perfect crispy texture, you might love these crispy air fryer potato wedges as a side dish.

Ingredients for Air Fryer Meatloaf

For the Meatloaf:

Air Fryer Meatloaf

Recipe by Air fryer RepastsCourse: Main CourseCuisine: AmericanDifficulty: Easy
Servings

4

servings
Prep time

15

minutes
Cooking time

45

minutes
Calories

400

kcal

Ingredients

  • 1.5 pounds ground beef

  • 0.5 cup breadcrumbs

  • 0.5 cup milk

  • 1 large egg

  • 2 tablespoons ketchup

  • 1 teaspoon salt

  • 0.5 teaspoon pepper

  • 1 tablespoon Worcestershire sauce

  • 0.5 teaspoon garlic powder

  • 0.5 teaspoon onion powder

Directions

  • Preheat your air fryer to 375°F. This step ensures that the meatloaf cooks evenly and maintains its juiciness.
  • In a large bowl, combine ground beef, breadcrumbs, milk, beaten egg, and all seasonings. Mix gently to combine without overworking the meat.
  • Shape the mixture into a loaf. Ensure the loaf fits well in your air fryer basket without touching the sides for even cooking.
  • Place the meatloaf in the air fryer basket on a piece of parchment paper for easy removal without sticking.
  • Cook the meatloaf for 30 minutes. Afterward, check the internal temperature. It should reach at least 160°F for safety.
  • Brush the top with ketchup. Cook for an additional 10-15 minutes until the top is browned and lightly caramelized.
  • Remove from air fryer and let it rest for 10 minutes. This allows the juices to redistribute, making it more tender.
  • Slice and serve with sides of your choice, such as mashed potatoes or steamed vegetables for a complete meal.

Notes

  • This air fryer meatloaf is a quick and easy way to enjoy a classic comfort dish with a modern twist. The air fryer ensures a crispy crust while keeping the inside tender and juicy. Perfect for busy weeknights, it’s ready in less time than traditional oven-baked meatloaf and uses minimal oil, making it a healthier option.

For the Glaze:

  • 1/4 cup ketchup
  • 2 tablespoons brown sugar
  • 1 tablespoon Worcestershire sauce

This simple ingredient list results in a flavorful, moist meatloaf with a perfectly balanced glaze.

Step-by-Step Instructions for Air Fryer Meatloaf

1. Prepare the Meat Mixture

  1. In a small bowl, soak the breadcrumbs in the milk for 5 minutes. This step helps keep the meatloaf moist.
  2. In a large mixing bowl, combine the soaked breadcrumbs, ground beef, egg, onion, garlic, salt, pepper, and parsley.
  3. Gently mix the ingredients until just combined. Avoid overmixing the ingredients, as this can result in a dense and tough meatloaf.

2. Shape the Meatloaf

  1. Form the meat mixture into a loaf shape. Make sure it fits comfortably in your air fryer basket.
  2. For easier cleanup, place the loaf on a piece of parchment paper or aluminum foil with holes punched in it to allow airflow.

3. Make the Glaze

  1. In a small bowl, whisk together the ketchup, brown sugar, and Worcestershire sauce.
  2. Set aside half of the glaze to brush on during the cooking process.

4. Cook the Meatloaf in the Air Fryer

  1. Preheat your air fryer to 350°F (175°C).
  2. Put the meatloaf in the air fryer basket and cook it for 20 minutes.
  3. After 20 minutes, brush the meatloaf with half of the glaze.
  4. Continue cooking for another 5-10 minutes, or until the internal temperature reaches 160°F (71°C).
  5. Use a meat thermometer to check for doneness.

5. Rest and Serve

  1. After cooking, allow the meatloaf to rest for 5-10 minutes.
  2. This allows the juices to redistribute, keeping it moist and tender.
  3. Slice and serve with your favorite sides.

Tips for Perfect Air Fryer Meatloaf

  1. Don’t Overmix: Mix until just combined to avoid a dense texture.
  2. Use a Meat Thermometer: This ensures the meatloaf is cooked through without overcooking.
  3. Let It Rest: Allowing the meatloaf to rest ensures it stays juicy and flavorful.
  4. Experiment with Meats: Try mixing ground pork, turkey, or even chicken for different flavors.
  5. Add Veggies: Finely chopped bell peppers, carrots, or celery can add extra flavor and nutrients.

Serving Suggestions

Pair your air fryer meatloaf with these delicious side dishes for a complete meal:

These sides are quick, easy, and perfectly complement the flavors of your meatloaf.

Common Mistakes to Avoid

  1. Overpacking the Meatloaf: Too much pressure when shaping can lead to a dense loaf.
  2. Skipping the Glaze: The glaze adds moisture and flavor, so don’t skip it!
  3. Not Checking the Temperature: Use a thermometer to avoid undercooking or overcooking.
  4. Skipping the Resting Time: This step is crucial for a juicy meatloaf.

Storing and Reheating Tips

Storing:

  • Cover the meatloaf securely with plastic wrap or aluminum foil. Keep it in the refrigerator for as long as 4 days.
  • To store it for a longer period, freeze individual slices in an airtight container for up to 3 months.

Reheating:

  • Air Fryer Method: Reheat at 325°F (160°C) for 5-10 minutes to keep the crust crispy.
  • Microwave Method: Heat on high for 2-3 minutes, covering with a damp paper towel to prevent drying out.

FAQs About Air Fryer Meatloaf

1. How long should you cook meatloaf in an air fryer?

Cook at 350°F (175°C) for about 25-30 minutes or until the internal temperature reaches 160°F (71°C).

2. Can you use aluminum foil in an air fryer?

Yes, but make sure to leave room for airflow to avoid uneven cooking.

3. How can you prevent meatloaf from breaking apart?

Use breadcrumbs and egg as binders, and avoid overmixing.


Final Thoughts

Making air fryer meatloaf is a simple way to enjoy a classic dish with modern convenience. The combination of a crispy crust, juicy interior, and quick cooking time makes this recipe a winner for busy weeknights or special occasions. Pair it with some crispy sides like air fryer potato wedges, and you’ll have a complete, satisfying meal.

Happy air frying!

Air Fryer Potato Wedges: Perfectly And delicious

Air Fryer Potato Wedges

Air fryer potato wedges are the perfect combination of crispy, golden-brown outsides and fluffy insides. These wedges are not only easy to make but also a healthier alternative to deep-fried options. Whether you’re new to air frying or looking to perfect your technique, this guide covers everything you need to know to achieve crispy perfection. We’ll also share tips, seasoning variations, and the best way to serve your wedges.

If you love quick and easy air fryer recipes, these wedges are about to become a regular on your menu. Let’s dive in!

Why Choose Air Fryer Potato Wedges?

There are plenty of reasons why air fryer potato wedges have become a go-to snack and side dish. Here are some top benefits:

  1. Healthier Alternative: Air frying uses up to 80% less oil compared to deep frying, making these wedges a healthier option. According to Healthline, air frying reduces fat and calorie intake significantly.
  2. Quick and Easy: Air fryers are efficient, taking just 15-20 minutes to cook potato wedges to perfection.
  3. Crispy Texture: The air circulation in the fryer ensures that your wedges come out crispy on the outside and soft on the inside.
  4. Less Mess: No splattering oil or greasy mess to clean up afterward!

For a similar crispy experience, you might want to check out these crispy fingerling potatoes in the air fryer, which offer a delicious variation of this classic recipe.

Ingredients for Perfect Air Fryer Potato Wedges

To make the perfect potato wedges, you’ll need the following ingredients:

  • 4 medium Russet potatoes (or Yukon Gold for a creamier texture)
  • 2 tablespoons olive oil (or another high-smoke-point oil like avocado oil)
  • Salt and pepper to taste
  • Optional seasonings: Garlic powder, paprika, onion powder, dried herbs (like rosemary or thyme)

If you enjoy cheesy flavors, try seasoning them similarly to this crispy air fryer grilled cheese for an extra-rich twist.

Step-by-Step Instructions

Follow these easy steps to make crispy air fryer potato wedges:

Air Fryer Potato Wedges

Course: Snack, Side DishCuisine: AmericanDifficulty: Easy
Servings

4

servings
Prep time

10

minutes
Cooking time

25

minutes
Calories

180

kcal

Ingredients

  • 3 large russet potatoes

  • 2 tablespoons olive oil

  • 1 teaspoon garlic powder

  • 1 teaspoon paprika

  • 1 teaspoon salt

  • 0.5 teaspoon black pepper

  • 1 tablespoon chopped fresh parsley

Directions

  • Wash the russet potatoes thoroughly under running water and gently scrub the skins to remove any dirt. Pat them dry using a clean towel.
  • Cut the potatoes into wedges by slicing each potato in half, then into quarters, and finally into eighths.
  • In a large mixing bowl, combine the olive oil, garlic powder, paprika, salt, and black pepper. Stir to create a uniform seasoning blend.
  • Add the potato wedges to the bowl, ensuring each piece is coated evenly with the seasoning mixture by tossing the wedges in the bowl.
  • Preheat your air fryer to 400 degrees Fahrenheit for approximately 5 minutes to ensure it reaches the right cooking temperature.
  • Place the potato wedges in the air fryer basket in a single layer, avoiding overcrowding to ensure even cooking.
  • Cook the wedges at 400 degrees Fahrenheit for 20 to 25 minutes, shaking the basket halfway through the cooking time for even crispiness.
  • Carefully remove the potato wedges from the air fryer and sprinkle them with fresh parsley before serving. Check for desired crispiness and enjoy immediately.

1. Prepare the Potatoes

  • Wash the potatoes thoroughly to remove any dirt.
  • If desired, peel the potatoes. Leaving the skin on adds texture and nutrients.
  • Cut the potatoes into wedges by first slicing each potato in half lengthwise. Then, divide each half into 3-4 equal-sized wedges, depending on the potato’s size.

2. Soak the Wedges

  • Place the potato wedges in a bowl of cold water and let them soak for a minimum of 30 minutes.
  • After soaking, dry the wedges completely with a clean kitchen towel or paper towels. The more thoroughly you dry the potatoes, the crispier they will turn out.

3. Season the Wedges

  • In a large bowl, toss the wedges with:
    • 2 tablespoons of olive oil
    • Salt and pepper to taste
    • Your chosen seasonings (e.g., garlic powder, paprika, dried herbs)

4. Preheat the Air Fryer

  • Preheat your air fryer to 400°F (200°C) for about 5 minutes. Preheating ensures the wedges cook evenly.

5. Cook the Wedges

  • Arrange the wedges in a single layer in the air fryer basket. Avoid overcrowding to allow proper air circulation.
  • Cook for 15-20 minutes, shaking or flipping the wedges halfway through to ensure even cooking.
  • The wedges are done when they are golden-brown and crispy on the outside.

Tips for Extra-Crispy Potato Wedges

Achieving the crispiest potato wedges is all about technique. Here are some tips to ensure success:

  1. Dry Thoroughly: After soaking, make sure the wedges are completely dry. Excess moisture prevents them from crisping up.
  2. Use Cornstarch: Lightly dusting the wedges with cornstarch before cooking can enhance their crunchiness.
  3. Avoid Overcrowding: Cook in batches if necessary to ensure the wedges are not piled on top of each other.
  4. Shake the Basket: Halfway through cooking, shake the air fryer basket to ensure the wedges cook evenly on all sides.

Seasoning Variations

Want to switch things up? Try these delicious seasoning ideas:

  • Spicy Cajun Wedges: Season with paprika, cayenne pepper, and garlic powder for a spicy kick.
  • Garlic Parmesan Wedges: Toss the cooked wedges with grated Parmesan and garlic powder for a cheesy flavor.
  • Herby Delight: Add dried herbs like rosemary, thyme, and oregano for a fragrant touch.

For more air fryer inspiration, these crispy air fryer churros are a fun, sweet treat to enjoy after your savory wedges.

Serving Suggestions and Dipping Sauces

Air fryer potato wedges are incredibly versatile. Here are some serving ideas and dipping sauces:

Pair your wedges with a juicy air fryer New York strip steak for a complete and satisfying meal.

How to Store and Reheat Potato Wedges

Storing Leftovers

  • Place leftover wedges in an airtight container in the fridge for up to 3 days.

Reheating for Crispiness

  • To maintain their crunch, reheat the wedges in the air fryer at 350°F (175°C) for 5-7 minutes. This method brings back their crispy texture.

FAQs About Air Fryer Potato Wedges

Why Aren’t My Wedges Crispy?

  • Ensure the wedges are completely dry before cooking.
  • Avoid overcrowding the air fryer basket.

Can I Use Sweet Potatoes?

  • Absolutely! Sweet potatoes make a delicious, slightly sweet alternative.

What’s the Best Oil to Use?

  • Olive oil and avocado oil are great choices due to their high smoke points.

Conclusion

Making crispy air fryer potato wedges is easy, healthy, and incredibly satisfying. With the right preparation, seasoning, and cooking tips, you’ll achieve that perfect golden-brown crunch every time. Whether you’re serving them as a snack, a side, or pairing them with your favorite air fryer meals, these wedges are sure to be a hit.

Happy air frying! 🥔✨

Air Fryer New York Strip Steak: Juicy and Easy

Air Fryer New York Strip Steak

Cooking a Air Fryer New York Strip Steak is the perfect combination of convenience and gourmet flavor. With its consistent heat and quick cooking times, the air fryer guarantees a steak that is juicy, flavorful, and evenly cooked. This guide covers everything you need to know, from preparation to serving suggestions, to make the most of your air fryer.

Why Choose an Air Fryer for New York Strip Steak?

Air fryers are revolutionizing the way we cook by offering convenience without compromising taste. Here’s why they’re perfect for cooking Air Fryer New York Strip Steak:

  • Time Efficiency: Air fryers cut down on cooking time, delivering a steak in less than 15 minutes.
  • Healthier Cooking: Minimal oil usage makes it a healthier alternative to traditional frying or grilling.
  • Consistent Results: Controlled temperature ensures even cooking with a beautiful crust.

For more snack ideas, see how air fryers excel in dishes like corn ribs air fryer ultimate snack. For vegetable lovers, consider artichoke hearts in the air fryer as a side dish.

Preparing Your Air Fryer New York Strip Steak

Proper preparation is the foundation of a perfectly cooked steak. Follow these steps for the best results:

1. Choose the Best Cut

  • Opt for steaks with even marbling for maximum flavor.
  • Look for a thickness of 1–1.5 inches to prevent overcooking.

2. Season the Steak

Enhance the natural flavors of your steak with a simple seasoning blend:

  • Classic salt and pepper.
  • Experiment with garlic powder, paprika, or steak seasoning blends for added depth.

3. Bring Steak to Room Temperature

Allow the steak to rest at room temperature for 20–30 minutes before cooking. This step ensures even cooking and better absorption of seasonings.

Cooking Air Fryer New York Strip Steak

Here’s a step-by-step guide to creating a perfectly cooked steak in your air fryer:

🥩 Air Fryer New York Strip Steak 🥩

Recipe by Air Fryer Repasts
Servings

2

servings
Prep time

5

minutes
Cooking time

10

minutes
Calories

320

kcal

This recipe doesn’t contain pork or alcohol.
Hi there, food lover! 👋 Ready to make a perfectly cooked steak with a juicy center and a crispy, caramelized crust? Let’s get started!

Ingredients:

  • 2 New York strip steaks (1-1½ inches thick)

  • 1 tbsp olive oil

  • 1 tsp salt

  • ½ tsp black pepper

  • 1 tsp garlic powder

  • 1 tsp smoked paprika

  • 1 tbsp unsalted butter (optional)

  • Fresh rosemary or thyme (optional, for garnish)

Directions

  • Prepare the Steaks: Pat the steaks dry with paper towels. Brush both sides with olive oil, then season evenly with salt, black pepper, garlic powder, and smoked paprika.
  • Preheat the Air Fryer: Set the air fryer to 400°F (200°C) and preheat for 3-4 minutes.
  • Cook the Steaks: Place the seasoned steaks in the air fryer basket in a single layer. Cook for 8-10 minutes, flipping halfway through,
    for medium-rare (internal temperature of 135°F/57°C).
    Adjust cooking time for desired
    doneness:
    Medium: 10-12 minutes (145°F/63°C)
    Medium-well: 12-14 minutes (150°F/66°C)
  • Rest the Steaks: Transfer the cooked steaks to a plate and let them rest for 5 minutes to retain their juices.
  • Serve: Top with a pat of butter and garnish with fresh rosemary or thyme, if desired. Serve alongside your favorite sides, like mashed potatoes or roasted veggies.

Notes

  • Notes:
    Steak Thickness: Adjust cooking time for steaks thinner or thicker than 1-1½ inches. Use a meat thermometer for accuracy.
    Marinating Option: Marinate steaks in olive oil, garlic, and herbs for 30 minutes before cooking for extra flavor.
    Crisp Finish: For an extra-seared crust, finish steaks in a hot skillet for 1 minute per side after air frying.

1. Preheat the Air Fryer

Set the air fryer to 400°F (200°C) and preheat for 5 minutes. Preheating is essential for achieving an even crust.

2. Prepare the Air Fryer New York Strip Steak

  • Pat the steak dry with paper towels.
  • Lightly spray both sides with olive oil to promote browning.
  • Generously apply your preferred seasoning blend.

3. Cooking Time and Temperature

Place the steak in the air fryer basket and cook for the following times:

  • Rare: 6-8 minutes
  • Medium-Rare: 8-10 minutes
  • Medium: 10-12 minutes Flip the steak halfway through cooking and check the internal temperature with a meat thermometer:
  • Rare: 120°F
  • Medium-Rare: 130°F
  • Medium: 140°F

4. Resting the Steak

After cooking, let the steak rest for 5–10 minutes, tented with foil. This step allows the juices to redistribute, enhancing flavor and tenderness.

Pro Tips for the Best Air Fryer New York Strip Steak

  • Achieve a Perfect Crust: Ensure the steak is dry before cooking and lightly spray with oil for a crispy exterior.
  • Reverse Searing: Cook the steak at a lower temperature first, then finish with high heat for a professional-grade crust.
  • Enhance Flavors: Add garlic herb butter or drizzle with Worcestershire sauce post-cooking for extra richness.

For another juicy steak recipe, explore the rib-eye steak air fryer guide.

Ideal Pairings for Air Fryer New York Strip Steak

No steak dinner is complete without delicious sides and drinks. Here are some pairing suggestions:

Sides

  • Mashed Potatoes: A creamy classic that complements steak beautifully.
  • Crispy Fingerling Potatoes: Try this recipe for crispy air fryer fingerling potatoes.
  • Roasted Asparagus: A light, healthy vegetable option.

Drinks

  • Red Wine: A full-bodied Cabernet Sauvignon or Merlot enhances the steak’s flavors.
  • Mocktails: A sparkling lime spritzer pairs well for non-alcoholic options.

FAQs About Cooking Air Fryer New York Strip Steak

1. How long should you cook a New York strip steak in an air fryer?

Cooking time varies depending on thickness and desired doneness:

  • Rare: 6-8 minutes
  • Medium-Rare: 8-10 minutes
  • Medium: 10-12 minutes

2. Do you need to preheat the air fryer for steak?

Yes! Preheating ensures even cooking and helps achieve a proper crust.

3. Can you cook frozen steak in an air fryer?

Yes, but add an extra 5–7 minutes to the cooking time. Season the steak after it slightly thaws in the fryer.

Conclusion

Cooking New York strip steak in an air fryer is an easy, efficient, and flavorful way to enjoy steak at home. With the right preparation and techniques, you can achieve restaurant-quality results every time. Pair it with your favorite sides and drinks for a complete meal that’s sure to impress.

Have you tried this recipe? Share your tips and favorite variations in the comments below!

Corn Ribs Air Fryer: The Easy Ultimate Snack

corn ribs air fryer

corn ribs air fryer are the latest sensation in air fryer recipes. They’re crispy, flavorful, and incredibly easy to make. If you’ve been looking for a way to elevate your snacks or side dishes, this is it! This article will take you through everything you need to know, including preparation tips, variations, and serving ideas.

Why corn ribs air fryer Are a Must-Try

Air fryers are revolutionizing how we cook, and corn ribs air fryer are no exception. Here’s why this recipe is worth trying:

  • Healthy Cooking: Air frying uses minimal oil, resulting in crispy corn ribs air fryer without the guilt.
  • Quick and Convenient: You can make these delicious treats in under 15 minutes.
  • Versatile Dish: Perfect as a snack, appetizer, or side dish.

To explore other creative air fryer snacks, check out this recipe for crispy fingerling potatoes in an air fryer, which complements the corn ribs air fryer beautifully.

Ingredients and Tools Needed

Here’s what you’ll need to make corn ribs air fryer:

Ingredients:

🌽 Air Fryer Corn Ribs 🌽

Recipe by Air Fryer Repasts
Servings

4

servings
Prep time

10

minutes
Cooking time

10

minutes
Calories

120

kcal

This recipe doesn’t contain pork or alcohol.
Hi there, food lover! 👋 Let’s whip up some juicy, smoky, and crispy corn ribs in the air fryer. A fun twist on classic corn that’s packed with flavor!

Ingredients

  • 2 ears of fresh corn, husked and cleaned

  • 2 tablespoons olive oil

  • 1 teaspoon smoked paprika

  • 1/2 teaspoon garlic powder

  • 1/4 teaspoon cayenne pepper (optional, for heat)

  • 1/2 teaspoon salt

  • 1/4 teaspoon black pepper

  • Fresh parsley or cilantro (for garnish, optional)

  • Lime wedges (for serving)

Directions

  • Cut the corn into ribs:
    Carefully cut each ear of corn into quarters lengthwise to create “ribs.” Start by cutting the cob in half crosswise, then slice each half into quarters. Use a sharp knife and work on a stable surface for safety.
  • Season the corn:
    In a small bowl, mix olive oil, smoked paprika, garlic powder, cayenne pepper, salt, and black pepper. Brush this mixture generously over all sides of the corn ribs.
  • Preheat the air fryer:
    Preheat your air fryer to 400°F (200°C) for 3 minutes.
  • Cook the corn ribs:
    Arrange the seasoned corn ribs in a single layer in the air fryer basket. Cook for 8-10 minutes, flipping halfway through, until the edges are crispy and lightly charred.
  • Serve and enjoy:
    Sprinkle with fresh parsley or cilantro, and serve hot with lime wedges for an extra zesty kick.

Notes

  • Notes:
    Knife Safety Tip: Cutting corn cobs can be tricky—use a sharp chef’s knife and press firmly.
    Make It Spicy: Add extra cayenne or chili powder to amp up the heat.
    Storage: Best enjoyed fresh, but leftovers can be stored in the fridge and reheated in the air fryer for 2-3 minutes.

Tools:

  • Sharp knife
  • Cutting board
  • Air fryer

For more inspiration on air fryer creations, check out these juicy air fryer rib-eye steaks.

Step-by-Step Guide to Perfect corn ribs air fryer

  1. Prepare the Corn
    • Place each corn cob on a sturdy cutting board and cut it into quarters lengthwise. A sharp knife and careful handling are essential.
  2. Season the corn ribs air fryer
    • Mix olive oil, chili powder, garlic powder, and black pepper in a bowl.
    • Brush the mixture evenly onto the ribs.
  3. Cook in the Air Fryer
    • Preheat the air fryer to 400°F (200°C).
    • Arrange the corn ribs air fryer basket, ensuring they are not overlapping.
    • Cook for 12-15 minutes, flipping halfway through for even browning.
  4. Add Toppings
    • After cooking, drizzle with hot sauce or sprinkle with cotija cheese and fresh cilantro.

Variations and Serving Suggestions

The beauty of corn ribs air fryer lies in their versatility. Here are a few ways to customize them:

  • Mexican Elote Style: Add mayonnaise, cotija cheese, chili powder, and lime juice for a street food-inspired twist.
  • Sweet and Savory: Brush with a honey-butter glaze for a unique flavor profile.
  • Spicy Kick: Add cayenne pepper or your favorite hot sauce for a fiery touch.

Looking for a sweet counterpart? Try pairing this dish with these air fryer cinnamon apples for a delightful balance.

Health Benefits of corn rib air fryer

Corn is a rich source of fiber, vitamins, and antioxidants. Cooking it in an air fryer retains these nutrients while eliminating the need for excessive oil. Compared to traditional frying methods, air frying also cuts down on calories, making corn ribs air fryer a healthier choice.

Common Challenges and How to Solve Them

Cutting Corn Safely
Cutting through a corn cob can be tough. Use a sharp knife and stabilize the cob by laying it flat on a cutting board. For easier cutting, microwave the corn for 1-2 minutes to soften it.

Avoiding Overcrowding
Ensure the corn rib air fryer have enough space in the air fryer basket. Overcrowding can lead to uneven cooking.

Pro Tips for Perfect air fryer corn ribs

  • Even Coating: Toss the ribs with the seasoning in a large bowl for consistent flavor.
  • Optimal Texture: Flip the ribs halfway through cooking for even crispiness.
  • Batch Cooking: If making a large batch, keep cooked ribs warm in the oven while the next set cooks.

FAQs About air fryer corn rib

How do you cut corn rib air fryer?

Use a sharp knife and cut the cob lengthwise into quarters. Microwaving the corn briefly can help soften it for easier cutting.

Can you use frozen corn?

Yes! Thaw the corn first and pat it dry before cutting.

What’s the best seasoning for air fryer corn ribs?

Classic seasonings like chili powder and garlic powder work well, but you can experiment with BBQ rubs or Parmesan cheese.

Conclusion

Making air fryer corn ribs is simple, quick, and endlessly customizable. Whether you prefer spicy, sweet, or savory flavors, this recipe is guaranteed to impress. Pair your corn with other air fryer delights like crispy fingerling potatoes or cinnamon apples for a well-rounded meal.

Have you tried this recipe? Share your tips and variations in the comments below!

Air Fryer Artichoke Hearts: Crispy and Easy

air fryer artichoke hearts

Artichoke hearts, with their tender texture and distinct taste, have long been a favorite in Mediterranean cuisine. When cooked to perfection, they make a fantastic snack, appetizer, or side dish. If you’ve never tried air frying artichoke hearts, you’re in for a treat. This method not only makes them crispy but also enhances their natural flavor, all while being healthier than traditional frying. Whether you’re a seasoned air fryer user or just starting to explore its potential, air fryer artichoke hearts are an easy yet sophisticated dish to add to your repertoire.

In this article, you’ll learn everything you need to know about making crispy, flavorful artichoke hearts in your air fryer. From the ingredients you’ll need to step-by-step instructions and customization tips, you’ll find everything you need for a perfect dish. Plus, we’ll cover how to serve and store them, ensuring that your air fryer artichoke hearts are as convenient as they are delicious.

Why Air Fryer Artichoke Hearts Are a Must-Try

Learn More About Artichoke Hearts

Air fryers have revolutionized how we cook, allowing us to make traditionally deep-fried foods with less oil, fewer calories, and quicker cooking times. Air fryer artichoke hearts are no exception, offering you all the crunch you crave without the need for excessive oil or complicated steps.

Healthier Cooking Option

When you choose to air fry artichoke hearts, you’re opting for a healthier alternative to traditional frying. The air fryer uses hot air to circulate around the food, creating a crispy texture without submerging it in oil. This results in:

  • Lower fat content: You’ll use significantly less oil than deep frying, making the dish lighter while retaining that perfect crispy texture.
  • Retained nutrients: The air fryer helps preserve the vitamins and minerals found in artichokes, making them a healthier snack choice.

Quick and Efficient

Cooking in the air fryer is faster than traditional methods, which means you can enjoy your artichoke hearts in less time. Whether you’re looking for a quick snack or need a last-minute side dish for dinner, the air fryer has you covered:

  • No preheating: Air fryers heat up quickly, so there’s no need to wait around.
  • Faster cooking time: Most air fryer recipes for artichoke hearts take under 15 minutes to cook, compared to 30-40 minutes in the oven.

Crispy Exterior with a Tender Interior

The best part about air frying artichoke hearts is achieving the perfect texture. When cooked in the air fryer:

  • Crispy exterior: The high heat and circulating air ensure that the outer layer gets crispy without drying out.
  • Tender interior: Artichoke hearts retain their tenderness and juiciness on the inside, offering the perfect bite.

Ingredients for Making Air Fryer Artichoke Hearts

Before you start, gather the following ingredients. With just a few basic pantry items, you can create this crispy, flavorful dish that’s sure to be a hit.

🥬 Air Fryer Artichoke Hearts 🥬

Recipe by Air Fryer Repasts
Servings

4

servings
Prep time

10

minutes
Cooking time

12

minutes
Calories

140

kcal

This recipe doesn’t contain pork or alcohol.
Hi there, food lover! 👋 Let’s make crispy, golden air fryer artichoke hearts that are bursting with flavor and so easy to prepare!

Ingredients

  • 1 can (14 oz) artichoke hearts, drained and patted dry

  • 1/2 cup breadcrumbs (panko or regular)

  • 1/4 cup grated Parmesan cheese

  • 1 teaspoon garlic powder

  • 1 teaspoon paprika

  • 1/2 teaspoon salt

  • 1/4 teaspoon black pepper

  • 2 large eggs, beaten

  • Cooking spray

Directions

  • Prepare the artichokes:
    Drain the artichoke hearts thoroughly and pat them dry with a paper towel. This helps the coating stick and ensures crispiness.
  • Set up the coating station:
    In one bowl, beat the eggs. In another bowl, mix breadcrumbs, Parmesan, garlic powder, paprika, salt, and pepper.
  • Coat the artichoke hearts:
    Dip each artichoke heart in the beaten egg, letting any excess drip off, then roll it in the breadcrumb mixture until fully coated.
  • Preheat the air fryer:
    Preheat your air fryer to 375°F (190°C) for 3 minutes.
  • Air fry the artichokes:
    Place the coated artichoke hearts in a single layer in the air fryer basket. Lightly spray them with cooking spray. Cook for 10-12 minutes, flipping halfway through, until golden brown and crispy.
  • Serve and enjoy:
    Serve hot with your favorite dipping sauce, like aioli, marinara, or ranch.

Notes

  • Notes:
    Fresh Artichokes: If you prefer fresh artichokes, steam or boil them first until tender, then proceed with the recipe.
    Make It Gluten-Free: Use gluten-free breadcrumbs.
    Storage: Leftovers can be stored in an airtight container and reheated in the air fryer for 2-3 minutes.
IngredientQuantity
Canned or frozen artichoke hearts1 can (14 oz) or 1 package (about 12-15 hearts)
Olive oil (or oil spray)1-2 tbsp
Garlic powder1 tsp
Onion powder1 tsp
Lemon juice1 tbsp
SaltTo taste
Black pepperTo taste
Optional: Parmesan cheese2 tbsp
Optional: Fresh herbs (parsley, thyme)A handful

These ingredients are all you need to make flavorful air fryer artichoke hearts. Olive oil or a light spray will help the artichokes crisp up nicely, while the garlic and onion powder bring out the natural flavors. The optional Parmesan cheese can add a cheesy, savory finish to your dish, and fresh herbs are a great way to enhance the overall flavor.

Step-by-Step Guide to Making Air Fryer Artichoke Hearts

Now that you have all your ingredients ready, let’s walk through the process of making crispy and flavorful air fryer artichoke hearts.

Step 1: Prepare the Artichoke Hearts

The first step is to prepare the artichokes so they’ll crisp up perfectly.

  • If using canned artichoke hearts: Drain the artichoke hearts and rinse them under cold water. Pat them dry with a paper towel to remove any excess moisture. This is important because moisture can prevent them from crisping up in the air fryer.
  • If using frozen artichoke hearts: Thaw the artichokes and dry them the same way, ensuring that there’s no extra moisture on the surface.

Step 2: Season the Artichokes

Once your artichokes are prepared, it’s time to season them:

  • In a bowl, combine the olive oil, garlic powder, onion powder, salt, and black pepper. You can also add a bit of Parmesan cheese at this stage if you’d like a cheesy flavor.
  • Toss the artichoke hearts in the seasoning mixture, making sure each heart is evenly coated. If you want an extra layer of flavor, sprinkle additional seasoning or cheese on top after coating.

Step 3: Preheat the Air Fryer

Preheating the air fryer ensures even cooking and crispy results. Set your air fryer to 375°F (190°C) and let it heat for 2-3 minutes.

Step 4: Air Fry the Artichokes

  • Arrange the seasoned artichoke hearts in a single layer in the air fryer basket. Be sure not to overcrowd them, as this can prevent them from crisping evenly.
  • Cook the artichokes for 10-12 minutes, flipping them halfway through to ensure they cook evenly on all sides.
  • Check for a golden brown, crispy exterior. If you like them extra crispy, you can add an additional 1-2 minutes of cooking time.

Step 5: Serve and Enjoy

Once the artichoke hearts are golden and crispy, remove them from the air fryer. If you’d like, sprinkle them with a little fresh lemon juice or chopped herbs for added flavor. Serve them immediately as a snack, appetizer, or side dish!

Variations and Customizations

One of the best things about air fryer artichoke hearts is how customizable they are. Here are some fun variations you can try to make them even more delicious:

1. Spicy Artichoke Hearts

For those who enjoy a little heat, add a pinch of cayenne pepper, red pepper flakes, or paprika to the seasoning mix. This will add a spicy kick to the crispy artichoke hearts.

2. Cheesy Artichoke Hearts

For an indulgent twist, sprinkle grated Parmesan cheese or mozzarella on top of the artichokes after the first 5-7 minutes of cooking. This will create a gooey, cheesy crust.

3. Lemon and Herb Artichoke Hearts

After cooking, drizzle your air fryer artichoke hearts with fresh lemon juice and sprinkle with chopped fresh herbs like parsley, thyme, or rosemary for a refreshing, aromatic finish.

4. Mediterranean Style

Top your crispy artichoke hearts with crumbled feta, Kalamata olives, and sun-dried tomatoes for a Mediterranean-inspired dish that’s bursting with flavor.

Serving Suggestions for Air Fryer Artichoke Hearts

Air fryer artichoke hearts are incredibly versatile and can be served in many different ways. Here are some ideas for serving them:

1. As an Appetizer

Air fryer artichoke hearts make an excellent appetizer. Serve them with a side of marinara, ranch, or garlic aioli dipping sauce for an extra burst of flavor.

2. As a Side Dish

These crispy artichokes pair wonderfully with grilled chicken, seafood, or roasted vegetables. Their crispy exterior and tender interior make them a perfect complement to many main dishes.

3. As a Snack

Looking for a healthy snack? Air fryer artichoke hearts are the perfect option. Enjoy them on their own or with a light dipping sauce for an afternoon pick-me-up.

4. As a Salad Topping

Add some crispy artichoke hearts to your salad for an unexpected crunch and burst of flavor. They make a great addition to a simple green salad or Mediterranean-inspired dish

Frequently Asked Questions (FAQs)

1. Can I use frozen artichoke hearts for this recipe?

Yes, you can use frozen artichoke hearts. Just make sure to thaw them thoroughly and pat them dry to remove excess moisture before seasoning and cooking.

2. How do I store leftover air fryer artichoke hearts?

Store any leftover artichoke hearts in an airtight container in the refrigerator for up to 2-3 days. To reheat, place them back in the air fryer for 3-4 minutes at 350°F to restore their crispiness.

3. Can I make air fryer artichoke hearts without oil?

Yes, you can skip the oil or use an oil spray for a lighter version. While the texture may be slightly different, you can still achieve a crispy result in the air fryer.

4. Can I make these ahead of time?

Yes, you can prepare and season the artichoke hearts ahead of time, then store them in the refrigerator until you’re ready to cook them in the air fryer.

Conclusion: Crispy, Flavorful Artichoke Hearts in No Time

Air fryer artichoke hearts are the perfect combination of crispy, tender, and flavorful. Whether you’re looking for a healthy snack, an elegant appetizer, or a quick side dish, this recipe ticks all the boxes. The air fryer makes it easier than ever to enjoy artichokes at their best—crispy on the outside, tender on the inside, and bursting with flavor.

So why wait? Try making air fryer artichoke hearts today, and let us know how they turn out! With endless ways to customize the flavor and texture, this dish is sure to become a favorite in your kitchen.

Call to Action:

Ready to try making air fryer artichoke hearts? Share your results with us, and don’t forget to experiment with new flavor combinations. Join the air fryer community and discover new, delicious ways to make crispy, healthy snacks at home!